Playing with eyeballs

January 10th, 2007

The plans have you pass the engine control cables through the firewall using plastic snap bushings, but I since I wanted something a lot more chafe- and fire-resistant I decided to use metal "eyeball" swivel fittings. These come in two basic varieties – one where the halves of the ball are retained only by a twist-on locking ring, and one where there are six screws holding everything in place. I've seen instances where the no-screw variety has come apart unexpectedly, so I decided to go with the seven-hole eyeballs despite the fact that they are a little more work to install.

Also, after the big deal I made about aluminum versus steel on the firewall, I was happy to see that the seven-hole eyeballs are available in steel as well as aluminum. However, after further investigation it became obvious that the steel flavor can only be enlarged up to 0.26" because of they way they're built (look at the photo on Van's website and you'll see why). The engine control cables are more like 3/8", so the steel eyeballs are out. Oh well, maybe since the aluminum balls are solid chunks of metal, not hollow, it'll take them longer to melt…

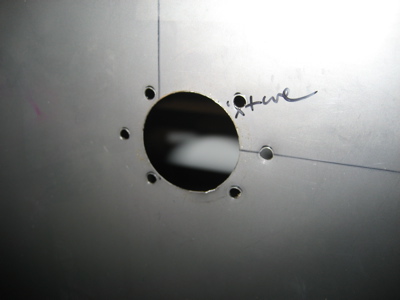
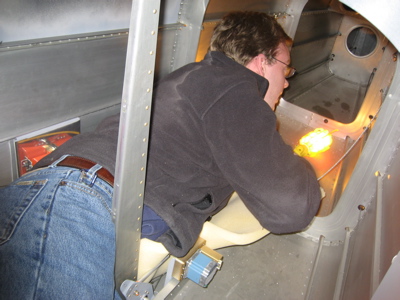
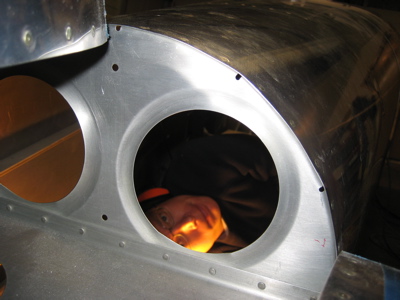
Anyway, I received three of the seven-hole eyeballs in my latest Aircraft Spruce order, so I decided to try installing one tonight. First you use a punch to mark the hole locations using the handy template they send you. I put my shop light on the other side of the firewall to help me line up the center pilot hole.

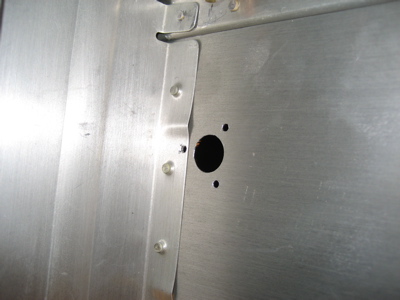
After drilling the screw holes, I used a Greenlee knockout punch to make the 1 1/8" center hole.

Those punches are expensive (on the order of fifty bucks per size) but they make pretty nice holes that need minimal deburring.

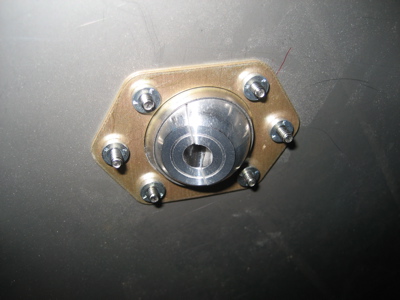
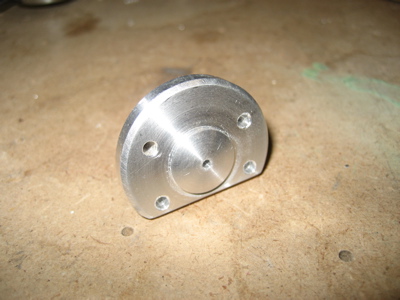
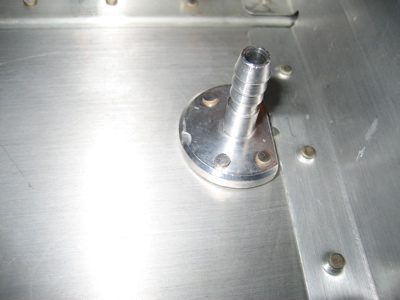
Here's the finished product. Four of the screws hold the ball retainer ring to the firewall, and the other two screws keep the nut ring on the back in place.

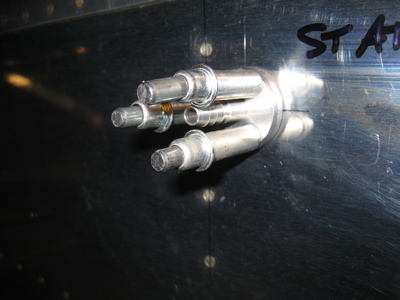
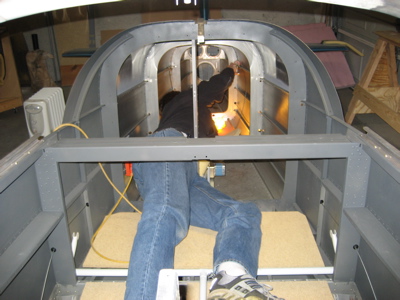
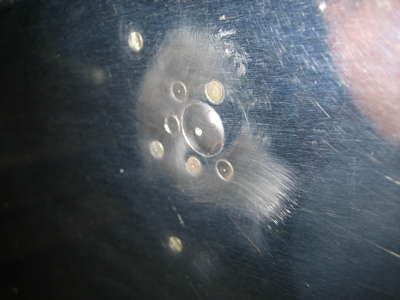
Viewed from the cabin side of the firewall, you can see the nut ring. Simple as can be.

I'm pretty happy with these fittings – I think they should work just fine. It should be easy later on to adjust them without needing to find somebody to help me put a wrench on both sides of the firewall. It's like two more minutes per eyeball to install, but the payoff in terms of secure attachment and ease of adjustment seems worth it to me.

Ordered exhaust

January 8th, 2007

I called Larry Vetterman and ordered an exhaust system for my engine. It's the same thing that Van's sells for $935 plus shipping, but by going straight to the manufacturer I was able to get it for $850 delivered.

I wanted to use the new kind that has built-in mufflers, but he said the mufflers won't fit if you have a forward-facing injector like mine. Oh well.

Installed static ports

January 7th, 2007

I decided to ditch the SafeAir static ports and picked up a set of Cleaveland ports instead. These have a wider protrusion that's more like the rivet they'll be replacing.

From the outside of the fuselage, I enlarged the pilot hole to 1/2" and drilled the three holes through which each port rivets to the fuselage.

To rivet these things in place, I had to crawl way back into the tailcone. To keep from banging up the airplane (and myself) I made these temporary floorboards out of thin particle board scraps I had laying around, and threw down a square of foam rubber too.

Here goes…

Ugh, this is no good. Since the Cleaveland ports are much bigger than the Van's rivet, if you use the plans location for the static ports you'll end up with the port overlapping the F-707 bulkhead flange. Crapola. If you're going to use aftermarket static ports, do yourself a favor and move them about 3/8" forward of the location called out in the plans.

Back out on the workbench, I decided to modify the static ports by cutting off a section, then drilling two more holes symmetrical with the remaining two.

Back into the fuselage again. Mary took a bunch of photos of me doing this. Trust me, it's less fun than it looks.

I backdrilled two more mounting holes per port, then we teamed up to dimple the holes using the pop rivet dimple dies. But first, Mary had to do the old "finger through the F-773 fuselage skin" trick.

It took a few more trips into the bowels of the airplane to get the ports riveted on for good.

There, all done. We put a short filler rivet in the unused fifth hole on each side.

From the outside, the new static ports look not too bad. Mary slipped with the rivet gun and slightly dinged this port, but I think it will be hidden by paint eventually. The swirl marks are from me doing a bit of polishing of a rivet head that was a few thousands proud of the skin.

I think I was in and out of the fuselage a total of six times today. I still need to run the plumbing back to the ports, but I need to pick up some little plastic clamps first.

In retrospect, I probably could have made the simple pop-rivet-as-static-port method called for in the plans work just fine, and it would have been a lot less work and expense. But then I just wouldn't be me.

Nuts and tires

January 6th, 2007

Avery has a really neat RV jack stand kit that makes it a lot easier to jack up the airplane. It requires you to modify your axle nuts in a manner that I was too lazy to do, so I paid a couple extra bucks to have them send me a pair of wheel nuts that already had the proper holes cut and slots milled into them. All I had to do was rivet the nutplate onto each one.

I also received my tires from Desser Tire today. These are Michelin Aviators with Airstop tubes – much higher quality than the tires Van's supplies (which I deleted from the finish kit). I used these on my last RV and they lasted forever and hardly ever needed airing up, which is a lot more than I can say about the cheapo Van's-supplied tires and tubes that airplane previously had. I figure it's worth it to spend the extra money here.

And for some reason, my cat loves them:

More firewall holes

January 6th, 2007

I mounted my firewall ground block on the upper part of the firewall, pretty much directly above the battery box, with enough room below it to replace the battery without hassle. You can see that the brass bolt B&C sent with the ground block kit is absurdly long. Next time I order another batch of electro-goodies I'll have to remember to ask them to throw in a shorter bolt for my firewall.

Here's the cabin side of the ground block, where you can see there are a lot more grounding tabs. I sprung for the biggest size (48 terminals) because I'm not sure how many ground points I'll need and I didn't want to run out. You can also see that I added an extra bolt (left side) to support the thing, because it seemed like it needed more attachment strength over there.

Here's a nutplate I installed that will eventually hold a clamp for the breather tube. It's right next to the heater valve I installed last night.

I drilled a pilot hole for the throttle cable, in the location specified in the plans – low and approximately in the middle of the firewall.

The mixture and prop cables come through higher up, on the left side of the airplane. The mixture cable hole was fine, but I couldn't put the hole for the prop cable in the spot spelled out in the plans because my parking brake valve is right there. In order to make it work I had to move the hole 1 3/4" to the left side of the airplane. This is probably a blessing in disguise, since apparently the stock position requires the prop control cable to have a pretty tight bend, which will be somewhat relieved by moving the hole further outboard. The only downside is that I'll probably have to use a cable with an unknown amount of extra length on it.

Looking from the inside, you can see that the prop and mixture cables will clear the parking brake on either side, whereas the plans position would have put the prop cable right underneath where I'd previously decided to put the parking brake valve. I suppose if I were smarter I would have done a better job of reading ahead when I installed the brakes, but oh well.

I drilled the bolt holes for the transducer manifold, but I can't attach it permanently until I get the subpanel ribs riveted on. That will in turn have to wait until I get a little further down the road, avionics-wise.

Not shown are a couple other locations where I drilled holes that will eventually allow various things to be bolted to the firewall. I think I'm nearly done with the firewall stuff that needs to get done before the engine arrives, with the exception of expanding the control cable holes up to full size and riveting on the firewall recess for good.