Completed aileron pushrods

December 15th, 2005

Here are the completed W-716 long aluminum aileron pushrods, with ends blind riveted in place:

And here are the completed W-818 short steel pushrods, with ends welded in place by local EAA guru Ken Perkins. Since the welding process took off some of the powder coat, I primed these parts with my usual GBP-988 and then topcoated them with Rustoleum enamel (machine grey) to prevent rust.

With the pushrods complete I started to work on the aileron bellcranks. Here's how I went about shortening the brass bushings that the bellcranks ride on – I chucked them gently in the drill press (with tape to protect from scratches) and ran them down onto a file until they fit:

Ran out of time to work tonight, but I'll hit it hard this weekend. Thanks to Ken for helping me weld up the aileron pushrods. No thanks to UPS, though: I received a shipment of strobe parts for the wings from Aircraft Spruce today, including one that had a cracked lens. Now I'll have to go through the hassle of return/replace.

An earlier aircraft construction project

December 11th, 2005

My dad reminded me that I've been building flying machines since at least age 3:

Since then I've switched from helicopters to fixed-wing aircraft, and from wood construction to aluminum.

Wing work

December 11th, 2005

I got the three good aileron brackets riveted to the rear spars without too many problems, although it did take some creative gymnastics to get the squeezer onto all the rivets. If you use the longeron yoke and a 4" no-hole yoke you can get all these rivets set without resorting to the bucking bar – as long as you're not picky about which side the shop head ends up on, since on some of the rivets, the squeezer can only be positioned one way.

Again notice the mix of flush and universal rivets, as called out by the plans:

Then I trimmed, deburred, and clecoed the flap braces in place. I still haven't quite figured out the strategy for attaching the flaps (i.e. what gets machine countersunk and what gets dimpled) so I'll just leave these guys clecoed in place until I get to that stage.

Then I started building the aileron pushrods. The long ones that connect the control sticks to the aileron bellcranks are made of 1.25" aluminum tubing, and the short ones that connect the bellcranks to the ailerons are made of small-diameter 4130 steel tube. My cheap cutoff saw came in handy to cut the tubes to the correct length:

After cleaning up the ends of the cut tubes, I sprayed copious amounts of aerosol primer down the insides until I could see that the innards were evenly coated. Then I also proceeded to prime the exterior surface of the aluminum pushrods – the steel ones are already powder-coated and don't need any further corrosion protection.

Here I've inserted the end cap thingies into the big pushrods and marked the locations for the rivets that hold them on. I'll wait until tomorrow to drill the holes, though, so the primer has a chance to fully cure (so I don't ding them up while working with them).

The plans also call for you to rivet end caps onto the steel pushrods as well, but they give you the option of welding them on too. I may try to find somebody to weld them up for me, since it seems like a welded pushrod end would have a smaller overall size, and thus require less enlargement of the exit hole in the rear spar.

Fabricated aileron attach brackets

December 10th, 2005

The first job I decided to tackle on the wings was the aileron attach brackets:

One is riveted to each tip rib:

And there's another one midway along each wing, in the same location where the aileron pushrod comes through the rear spar:

Even though there was still snow on the ground today, it was tolerably warm outside in the afternoon, at least enough that I was able to prime the bracket parts:

Here's one of the outboard brackets ready to rivet to the wing. Note the mix of flush and universal rivets. Careful plans reading is required here to make sure you follow the rivet callouts exactly.

I'll rivet three of these brackets to the wing tomorrow. Unfortunately, the fourth one is a no-go, because I decided that drilling out a rivet that was only "mostly" okay would be a good idea, and ended up enlarging the hole too much to use with these long rivets. I may try to pick up some 5/32" rivets to repair it, or I might just end up building one new bracket, since the parts aren't very expensive. Note to self: don't try to drill out AD4 rivets unless you really need to! The cure might be worse than the disease.

The other thing I did while I was reading over the wing plans to see what steps have already been completed at the quickbuild shop was to make a note on the inboard stubs of the rear spars, to remind myself that they need to be trimmed per the plans before the wings are installed to the fuselage.

Sorting parts

December 4th, 2005

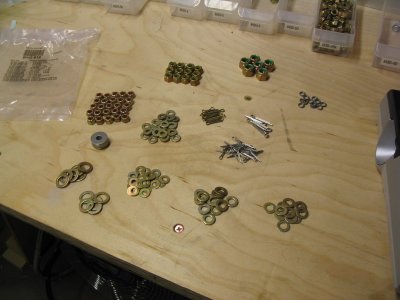
I've been checking off inventory items and sorting through little bags of parts for three days. Here's the contents of Bag #619:

Thrilling, isn't it?