Ten foot drill bit

July 9th, 2021

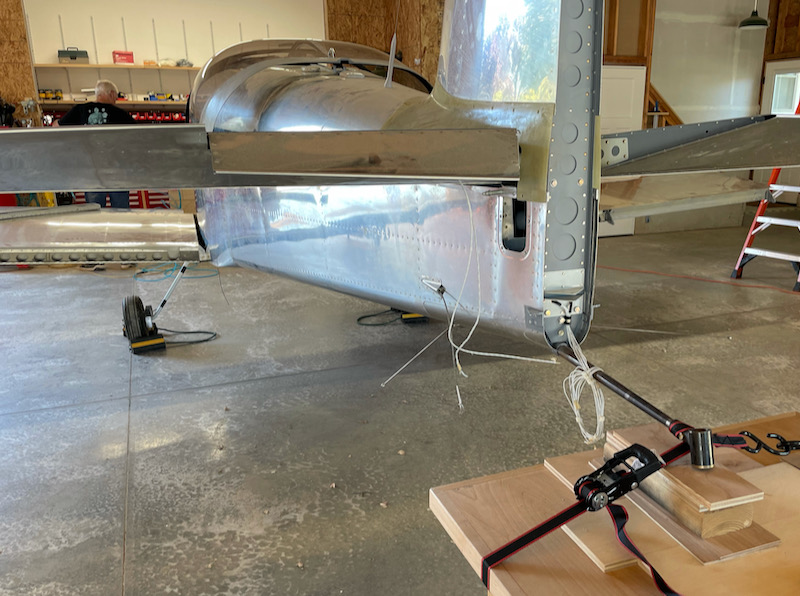
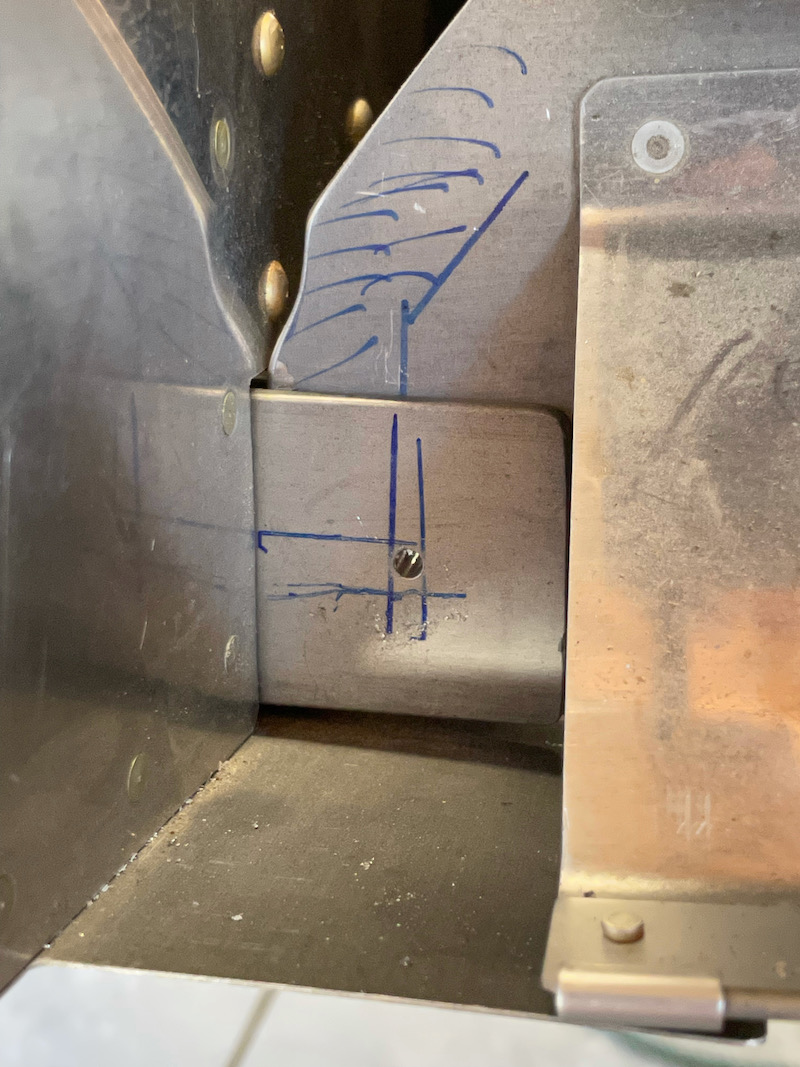
Long ago I followed the factory guidance for installing plastic wiring conduits in my wing ribs. Now that I'm working on attaching the wings, I've realized that the end of the conduit is nowhere close to the prepunched wiring hole in the fuselage (which you can even see in this photo). Since I need to accommodate a pair of 1/4" pneumatic tubes as well as a thick bundle of wires, I was going to need to add more holes in the fuselage anyway, so I decided to use the existing hole for the pitot/AOA plumbing and create a new hole for the wiring.

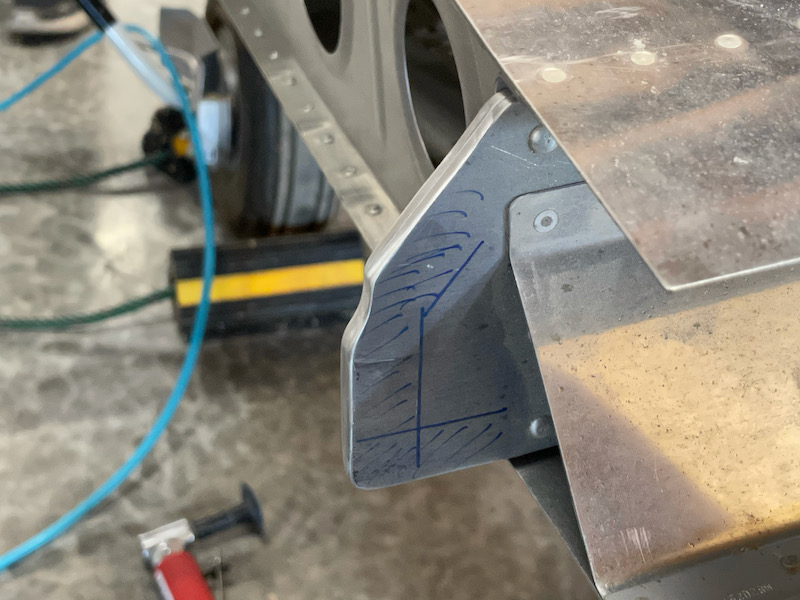
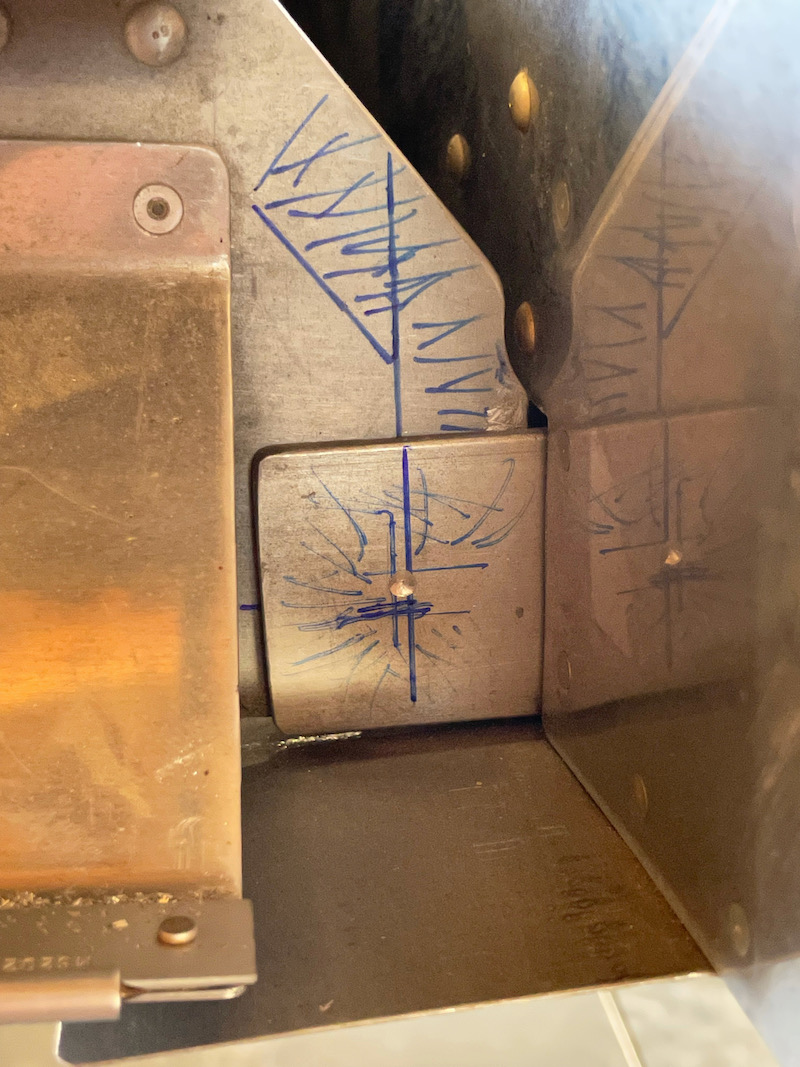
After checking for edge distance and clearance issues, I decided I ought to be able to put the new hole exactly in line with the end of the conduit. But how to locate the hole accurately? The gap between the wing and fuselage is too narrow to get an angle drill into, and even marking it with a sharpie seemed problematic. Then I thought, what if the hole could be drilled starting from the other end of the wing? All you'd need is a ten-foot drill bit!

I'm sure very long drill extensions exist somewhere, or you could daisy-chain a bunch of the 18" ones together, but those ideas sounded expensive. Instead, I fired up the lathe and made something that did the job, using nothing but stuff I had laying around anyway.

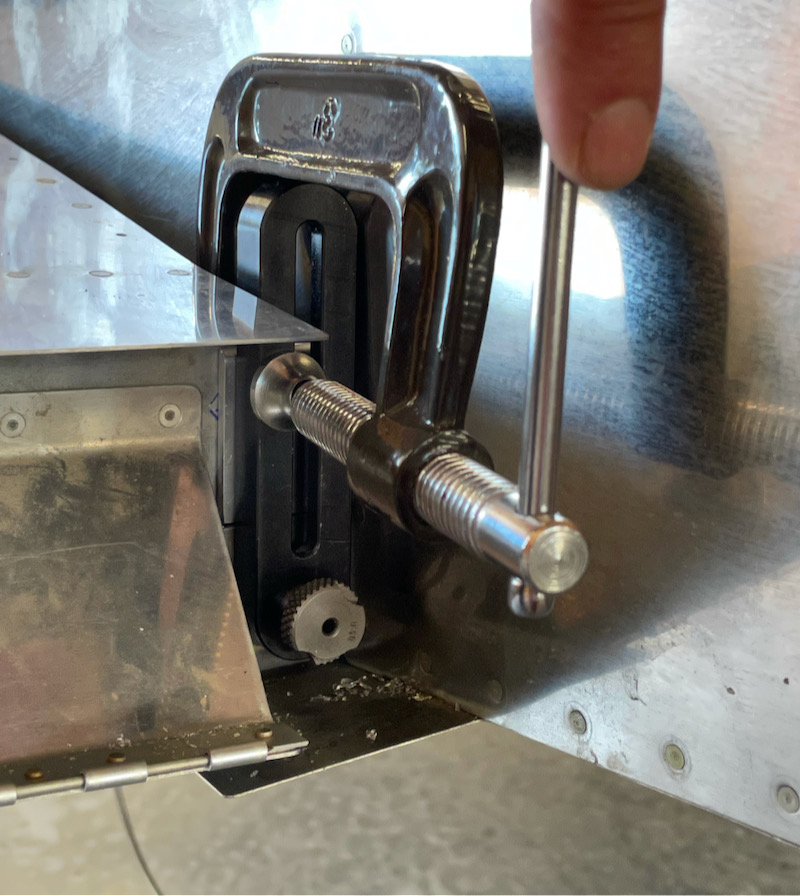
I turned down a piece of aluminum rod into a bullet-shaped thing. One end has an 8-32 stud, and the other end has 1/4-28 threads, into which I screwed a #40 threaded bit:

This I screwed to the end of my electrician's fish stick:

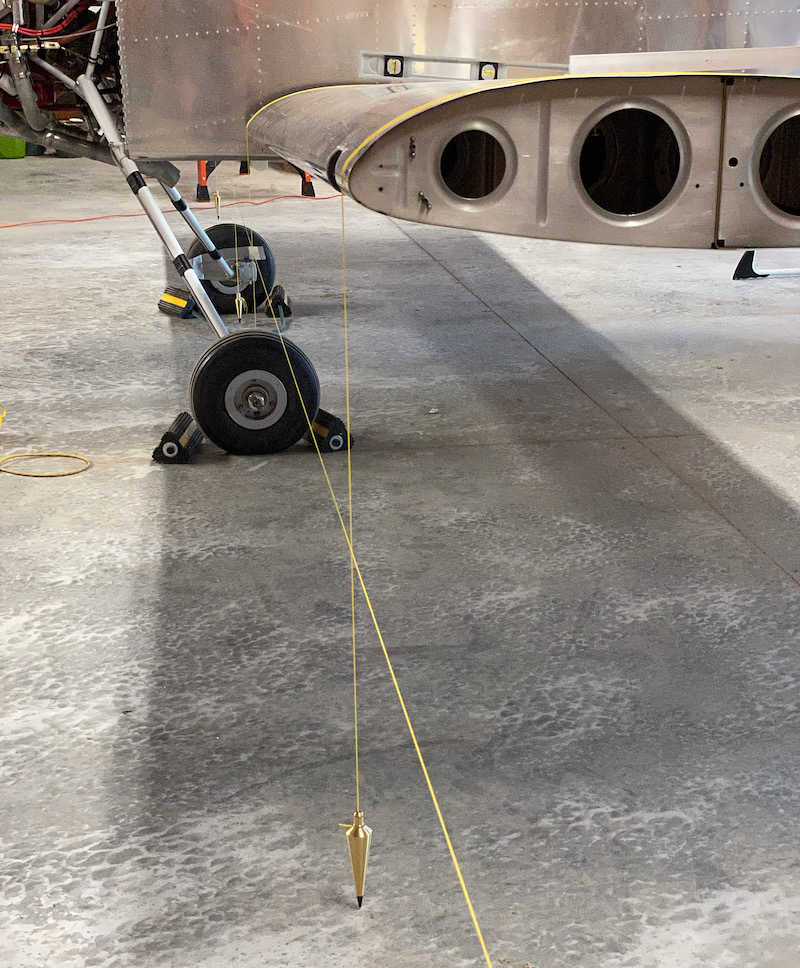
Then it was a simple matter of running the resulting contraption in from the wing tip to the root, chucking the outboard end in a drill, and having at it. It's not totally unlike snaking a drain:

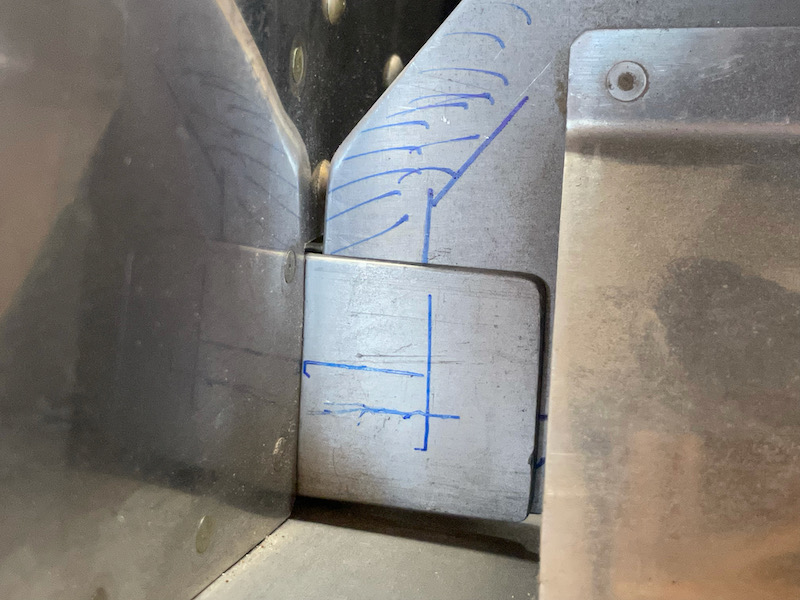
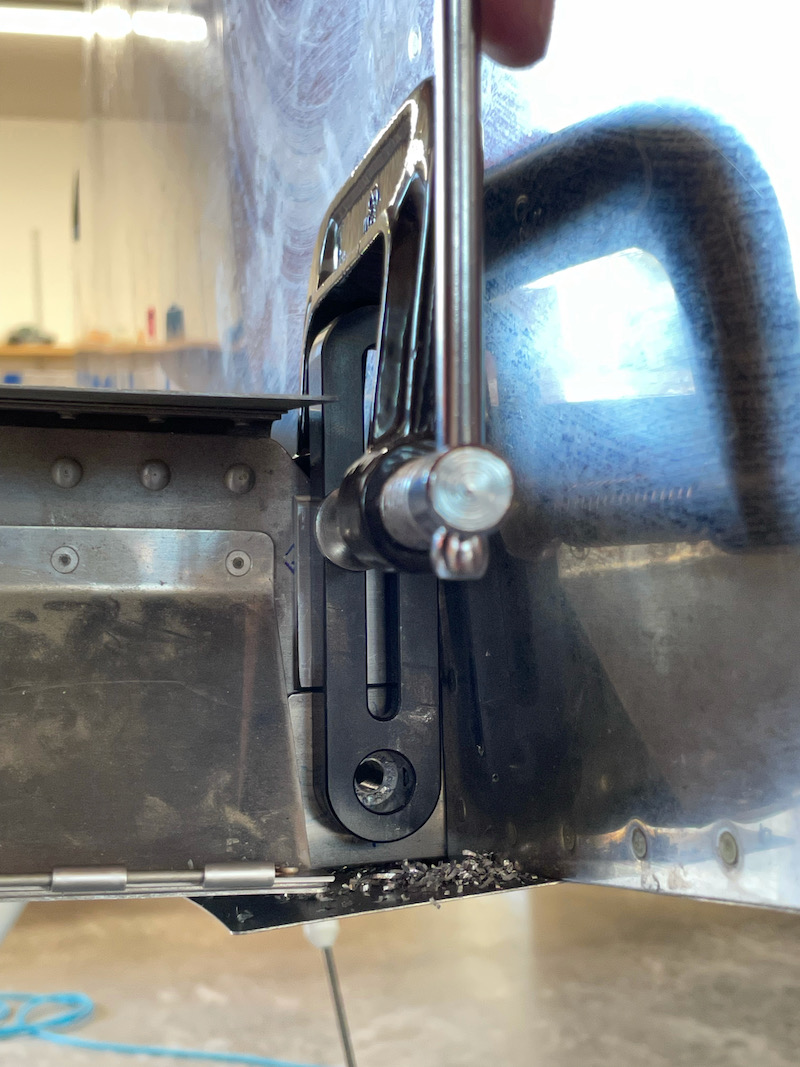
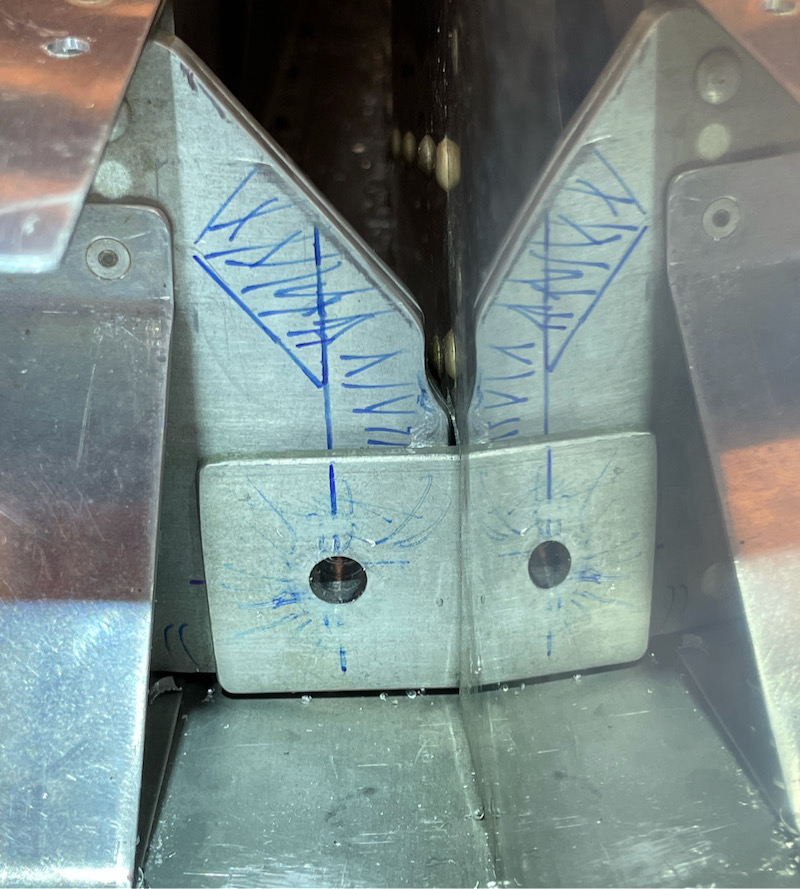
Result, one pilot hole exactly centered on the wing conduit. The space between the fuselage and wing aft of the spar is so tight I could barely take this photo, but you can see (via the reflection) that the "drill snake" has exited the conduit and gone straight into the fuselage skin; only the camera angle makes it look crooked. When the wings come off one more time, I'll enlarge these holes and install plastic snap bushings for the wires.

Wing attach details

July 4th, 2021

With the wings temporarily fitted to the fuselage, there are a handful of tasks to accomplish before removing them one last time. Careful planning will prevent too many on-off-on efforts – let's hope I didn't forget anything!

First up is the wing root faring, which will be screwed to nutplates all along the inboard edge of the wing. I was pleasantly surprised that the pre-punched holes lined up pretty well, although there is still some fiddling required (and watch the edge distance on the tank skin!).

The gap here is not perfect yet, but it's good enough to drill the fastener holes, which is my main concern. Once the wings are on permanently, I'll scribe and trim the edge of the root fairings to achieve a uniform gap into which I can install a rubber trim strip.

I drilled all the wing root fairing attach holes up to #19. The job of dimpling the holes and installing the nutplates will have to wait till the wings come off again.

I fitted the tank attach brackets, which required a few small tweaks to the bend angles, and drilled the bolt hole in each tank's mounting ear. When the wings are off I'll install a nutplate where this temporary bolt is:

Wing fitting

July 2nd, 2021

With all the remaining work on the wings completed satisfactorily, I summoned a friend to help me fit them to the fuselage. It was actually no big deal to mate the wings to the fuselage, although it's definitely a two-person job. After inserting the first wing spar into the center section, I climbed inside and drove in two 7/16" drift pins. Then we repeated the process for the other wing, and voila:

I removed the tailwheel and lifted the tail onto a table, adding wood shims underneath to level the fuselage at the longerons. Just for safety I strapped it all down, don't want to accidentally drop the tail on the ground.

I basically followed the factory guidance to make sure the wings were aligned in various directions. Here I'm using a series of plumb bobs to check the sweep angle:

The initial fitting showed a small amount of forward sweep on both wings, and almost zero margin laterally for edge distance in the rear spar (notice how the vertical no-go lines here are almost on top of each other). The issue for both wings was that a single round-head rivet was preventing the wing from being inserted fully. I know this is a common issue, so if you're reading this before you build the fuselage, do yourself a favor and put a flush rivet there instead.

We then I removed the wings again and I ground a relief notch in each rear spar – fortunately no edge distance worries in this location:

With the wings back on the fuselage, the rear spars can now be fully inserted, and the resulting sweep angle is essentially nil, a perfect result. And although the margin for edge distance still isn't huge, it's no longer zero:

After thoroughly checking the wing incidence using the prescribed jig and a digital level, I took a deep breath and drilled a pilot hole for the rear spar bolt:

Moving over to the other wing, this is the procedure I followed for drilling these holes. After checking and re-checking the incidence and edge distance, I marked and center punched the hole location, then spot-drilled a divot in the desired location. This isn't a full through-hole, it's just deep enough to center the drill bit in for the next step.

Using the divot as a guide, I used a bit to center my drill jig, then clamped it in place. There's a 1/8" spacer in there to allow the drill jig to sit level.

I drilled the initial 1/8" pilot hole, re-checked the edge distance, and then used progressively larger bushings to enlarge the hole without moving the jig. This resulted in a very straight and accurate hole.

The final drill size was a size N (.302") followed by a final pass with a .311" reamer.

The wings will have to come off at least once more before they get installed for good, and there's still a huge amount of work remaining, but it's wild to walk through the hangar and suddenly see the airplane looking properly airplane shaped!

Roll servo

June 20th, 2021

I'm now trying to wrap up a number of to-do items on the wings, one of which was to install the roll servo (again). Doing this while working through the inspection hole is not as terrible of a job as it seems, as long as you have skinny arms and you can work by feel. I torqued all the servo mounting hardware and the bellcrank pivot bolt, but I left the servo pushrod hardware loose since its length will need to be adjusted later.

I ran new wires through the wing for the servo, and used a couple of adel clamps to keep them securely constrained so they won't get tangled up with the flight controls:

The pushrod hardware called out by Garmin makes for tight clearance between this bolt and the servo housing, but it's probably adequate. I'll check this again when I'm doing the final rigging and control checks.

To test the new servo and wiring I wheeled the wings over to the fuselage and made some temporary connections with alligator clips:

Technically, the wings are now "connected" to the fuselage!

All is well with communication to the roll servo, so I can check this off my list:

Installed air vents

June 20th, 2021

As far as I can determine, the plans are silent on when to do the final installation of the cockpit air vents and exterior air scoops. It's probably best to delay this step until after riveting the forward top skin, since the air scoop openings can be used for riveting access, but since I'm now finished with that I could think of no reason not to put these in for good.

I painted the butter-colored plastic NACA scoops flat black, and attached them to the fuselage sidewalls with Proseal, all of which I somehow neglected to take photos of. Then, thanks to the over-complicated way I previously chose to attach the air scoops with both glue and rivets, I had to recruit Mary to crawl into the fuselage and hold the mounting rings in place while I pulled the rivets from the outside. This probably marks the first time in recorded history that it's taken two people to install a pop rivet.

(I don't know why she's flashing Vulcan gang signs)

Then I installed the ducts between the scoops and the panel vents. There are no details in the plans about how to secure these, so I just used some stainless hose clamps I had on hand. I also put a square of plastic window screen material over the mouth of each NACA scoop, to keep bugs out.

Shining a flashlight down the air scoop, you can see the black window screen at the back. Hopefully this will keep critters out of the cockpit.