Archive for the ‘Fuselage’ Category

Boxing day work

Tuesday, December 26th, 2006

Happy Boxing Day, whatever the heck that is. I celebrated the halfway decent weather by going flying.

I also did a few small chores on the airplane, or tried to. First I thought I'd install the ELT. My first location – directly behind the seat – turned out not to be so hot after all for a couple different reasons. For one thing, the downward angle of the floor behind the seatbacks is about 15-20 degrees off the waterline of the aircraft, more than the maxinum 10 degrees allowed by the ELT installation manual. Furthermore, if the seatback was installed in its aftmost position, the upholstery would tear itself up on the ELT and its bracket – not so good.

So, after playing with various ideas for a while, I finally decided that using Van's bracket kit (which I already have) to mount the ELT on the fuselage sidewall, right behind the baggage bulkhead, would be about as simple as anything. Unfortunately I discovered that I need a shorter #30 threaded drill bit and a smaller pop riveter to get back in there and install the thing, so all I was able to do with the ELT bracket today was look at it.

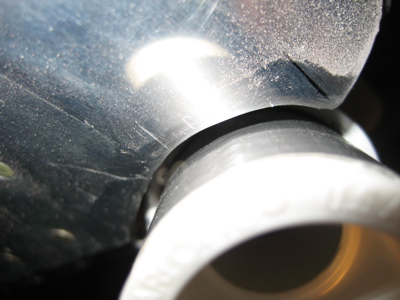
Then I decided to finish the cutouts in the lower firewall flange so the gear legs can eventually be installed in the engine mount. Since the fuselage is currently too low to the ground to get the actual gear legs under there, I had to improvise a fake gear leg tube out of a PVC pipe coupler and some duct tape to help it stay inserted in the socket. That made it very easy to eyeball the fit and mark out the areas that needed to be trimmed.
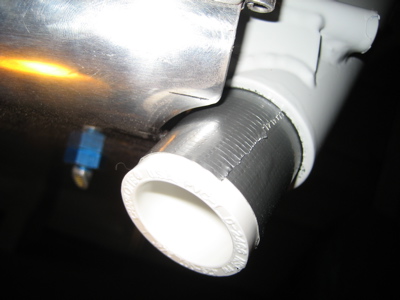
After three or four iterations with the Dremel tool and various forms of scotchbrite, I was able to get a nice uniform clearance all the way around. I should add that since I had to lay on my back underneath the airplane while I was doing this, I got aluminum and steel "snow" all over me in the process. Yuck. I wore safety gear and took a shower right afterwards so it wouldn't get into my eyes.
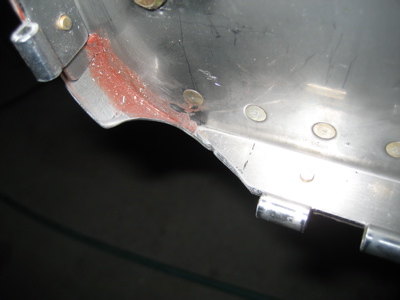
Here's the shape of the finished cutout. You can see that the outermost rivet hole is entirely obliterated. If I had waited to install the lower cowl hinges until after I'd finished these cutouts I could have saved myself an extra inch of hinge material, but oh well. I suppose I should be grateful that the amount you're required to cut isn't another 1/8" deeper, or else it would start chewing into the firewall itself.
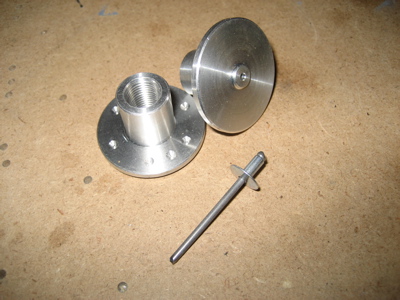
Another small puzzle I spent some time looking at tonight is the location and nature of the static ports. The plans would have you put a pop rivet into the fuselage skin on each side of the airplane, then pound out the mandrels and glue the ends of the plastic static tubing over the resulting hollow rivet shafts. Uh, no thanks. I had that setup on my last RV, and it gave me terrible static leaks until I replaced the cheesy rivets with a pair of Cleaveland static ports. I have a pair of nice looking machined static fittings (see photo below) that I picked up from Safeair in a moment of weakness, but I've heard of people having problems with them because they don't stick out far enough into the slipstream. It turns out that a static port that's too close to being flush with the skin doesn't do a very good job, and the Cleaveland ports stick out further than the Safeair ones. I may end up scrapping these and getting another pair of the Cleaveland ones instead.
I got as far as marking the static port locations and drilling a #40 pilot hole – one on either side of the fuselage, positioned as described in the plans. They'll be tee'd together to cancel out errors induced by side slips.
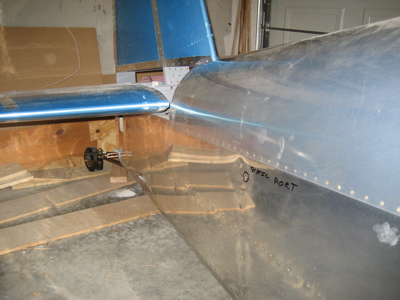
It's a loooong way back there into the tailcone where the static ports are. I can forsee this particular bit of plumbing is going to be a real joy to install.
Working on empennage fairing

Saturday, December 9th, 2006

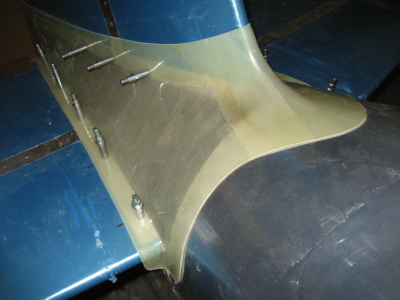
I got the empennage fairing out again and continued playing around with it. Here it's clecoed to the tail using the holes I'd previously made:

There's a ton of extra material to be trimmed off where the fairing wraps around the leading edge of the horizontal stabilizer. Then the gap underneath the stabilizer is closed by aluminum cover plates. You're sort of left to your own devices to figure out exactly how to make the front part of this come out looking nice.

I had to trim a fair amount off of the F-794 cover plates to make them fit. Maybe I can sell the scraps as aluminum curly fries.

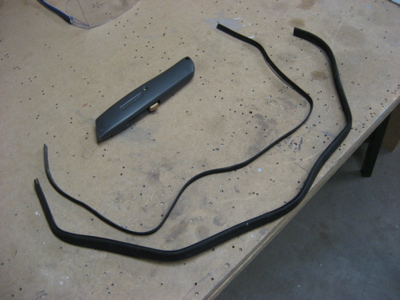
The kit comes with some rubber weather strip type of stuff, which you have to trim down.

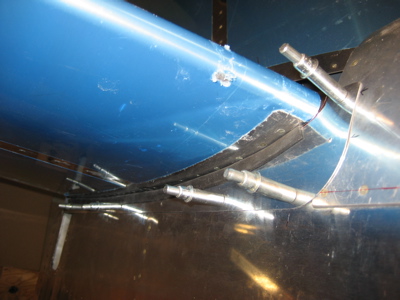
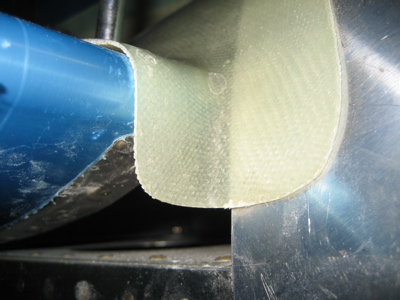
Here's one of the cover plates with the rubber strip on it. It's clecoed to the fuselage through some rivet holes in the longeron and bulkhead that I had to drill out. I wish the quickbuilders had left those holes open, because it's somewhat difficult to get under there and drill them out with the stabilizer attached, but oh well. It's hard to get the rubber strip to go completely around the curved are in the front, so I sized the cover plate piece to almost touch the stabilizer in that area instead.

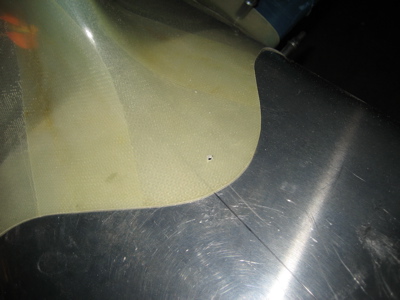
Here I've trimmed and sanded away the excess fiberglass of the fairing at the forward corners (ignore the sharpie lines, I was using them to test various ideas). As you can see, there's only a very small area that's not covered by fiberglass, aluminum, or rubber. It's on the bottom of the airplane so you'll never see it. Good enough.

I also finished the cutout for the elevator horns, and sanded the aft edges of the fairing to be even with the edges of the vertical and horizontal stabilizer skins.

Because the front part of the vertical stabilizer is offset to the left (i.e. right rudder) the center of the fairing doesn't sit on the centerline of the fuselage. I eyeballed this spot for a screw and nutplate on the forward lip.

Interestingly, in the spots where the fairing attach screws go into the fuselage longerons, the plans call for you to just tap the hole in the longeron instead of installing nutplates. I used to have problems with the screws backing out in this area on my old RV, so I'm wondering if it would be worth the extra trouble to use nutplates back here (because nutplates have a self-locking feature to secure the screws). May need to call Van's to make sure the extra rivet holes in the longeron wouldn't be a strength problem. At first glance it looks like there would be plenty of room between the nutplate rivets and the next rivets over.

Too cold

Sunday, November 26th, 2006

It's not warm enough in the garage to work on the canopy, so I moved it back into the house until summer. I'll work on the firewall-forward stuff instead.

Family visit

Sunday, November 19th, 2006

My family was in town visiting this weekend. My little brother Adam looked over every inch of the RV-7 project, and Al was nice enough to give him a demo flight in his RV-6A. He doesn't look like he enjoyed it at all…

While they were out I snapped some photos of this F4F Wildcat that was parked in the hangar. This particular airplane has a very interesting history.

After lunch, Adam helped me get the fuselage turned around. To do this we had to roll it out onto the driveway, which generated some very surprised looks from the people in the car that happened to drive past just then.

This orientation will make it a lot easier to work on the canopy and firewall-forward stuff. Just for grins we put the canopy bubble on top of the fuselage. It's going to need a lot trimming to make it fit well.

While my dad was in town, we used his Jeep to fetch a 4×8' sheet of 3/4" plywood from the hardware store. This will be my temporary working-on-the-canopy bench, since the canopy bubble is way too big to fit on my real workbenches.

I also bought another space heater. Next weekend I'll see if I can get the temperature in the garage up to the magic 70° mark so I can do some canopy trimming. If not, I guess I'll have to postpone any further work on the canopy until summer. Stay tuned…

Canopy correspondence

Wednesday, November 15th, 2006

Date: Mon, 13 Nov 2006 20:27:25 -0600 (CST)
From: Matt
To: Van's
Subject: RV-7 sliding canopy frame

Hi guys,

I've got the canopy frame on my RV-7 slider all fitted – I think – and I have a couple questions before I proceed:

1. I had an issue where the aftmost corner on the right side was rubbing/catching on the top skin when the canopy was slid back. I bent the right rear bow outward and it now clears the skin by a minimum of 1/16" on the right side, 1/8" on the left side. I am assuming that the spreading force of the canopy bubble will tend to increase this clearance, not diminish it, so I don't need to worry further. Is this a good assumption?

2. I got things arranged so that with the canopy tracks and slide rail screwed in place, the canopy will glide smoothly open with very light finger pressure. Then I slightly narrowed the front bow so that the rollers rub with moderate friction against the inboard faces of the tracks. My hope here is that if the plexiglass spreads it back out again, the rollers will wind up in the middle of the tracks and give smooth canopy operation. Is this worth doing or should I put it back to neutral and let things fall where they may?

thanks,
mcb

Date: Wed, 15 Nov 2006 07:50:14 -0800
From: Van's
To: Matt
Subject: Re: RV-7 sliding canopy frame

There will be some springback when the bubble is attached to the frame, but it is impossible to say how much on a given airplane.

Hmm. I was hoping for a more definitive answer. Luckily a friendly fellow on the VAF site offered this helpful response which seems to confirm my theory about the rollers.