Archive for the ‘Firewall Forward’ Category

Fuel hose

Saturday, March 9th, 2013

For years I've been looking at the hose that carries fuel from the firewall to the engine-driven fuel pump, wishing it wasn't so close to the engine mount. Finally I decided to do something about it. I replaced the straight fitting at the pump with a 90-degree elbow, and took the hose to a local aircraft hydraulic place to get it shortened by two inches.

Now there's plenty of clearance between the hose and the engine mount. It's a little tight between the hose and the starboard exhaust pipe support, but I can tweak that part's position when I put the exhaust back on.

Another view looking up from below. The location given in the plans for the bulkhead fitting that brings fuel through the firewall is plain wrong, if you ask me. At least on my airplane it's very close to the starter solenoid, the resulting hose routing is problematic (see this post), and it's pretty difficult to get a wrench on the hose end nut. A better location would be straight below the heater air valve – you can see in this photo that it's completely open, and the hose routing from the firewall to the fuel pump would be very straightforward when using a 90-degree elbow on the engine side. Maybe they don't have you drill the hole there because they're reserving room for the nosegear weldment, but my airplane doesn't have one of those. Oh well, yet another thing to file away for next time.

Installed new cylinders

Sunday, February 10th, 2013

After an unexpectedly long delay – due to schedule issues and also because ECI didn't send me all the expected parts on the first try – I finally managed to get my four new engine cylinders installed.

The cylinders are mounted and torqued, the pushrods and rocker arms are in, the oil drain tubes are back on, and the fuel injection lines are reinstalled and clamped. The intake and exhaust pipes are still off, since I want to get the EGT and CHT probes installed before I put them back on for good. And the rocker covers are not on yet because I ran out of steam and got tired of standing in the cold garage.

Grey cylinders with red pushrod tubes and crankcase is kind of a cool color scheme. Can't order 'em that way.

While I was complying with SB08-1, I also took care of SB12-1 by installing new stainless parts for the pushrod shroud tube retainer spring and lock tab.

Guiding me through this whole adventure was local engine guru Jerry Gippner, who taught me a lot about engine maintenance in the process. I think I could probably do it again on my own next time, so thanks Jerry for the education!

Next: Reinstalling baffles and other engine parts, hopefully for the last time (for the foreseeable future anyway).

Removed engine cylinders

Saturday, January 5th, 2013

One of the things I've been putting off for as long as possible is dealing with SB08-1, the dreaded ECI service bulletin. The gist of it is that if you are unlucky enough to have a cylinder that came from a bad batch, it must be replaced with a new one, lest it develop a crack in-flight with spectacular and exciting results. Imagine how lucky you have to be for all four of your cylinders to be bad, like mine are! Fortunately I was able to work out a warranty deal with the company, but it's still going to be an expensive fix. At least I'll come out ahead of where I'd be if I had to buy four new cylinders at full retail price.

I waited until I couldn't make any further progress on the engine without starting to attach things semi-permanently, then finally gritted my teeth and started unbolting things. I took off the baffles, dropped the exhaust (and sent it back to the manufacturer to fix a different potential cracking issue), pulled the spark plugs, and so forth.
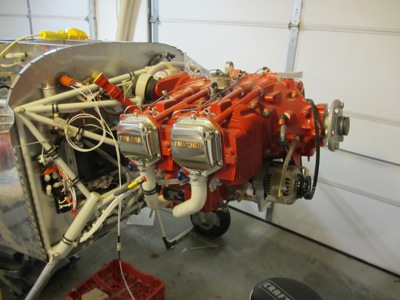
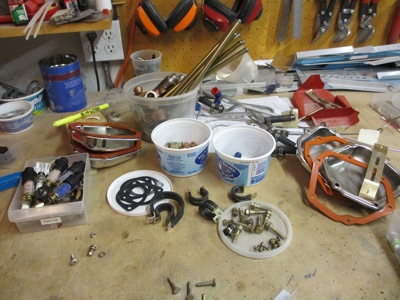
One of the many piles of stuff that came off the engine:
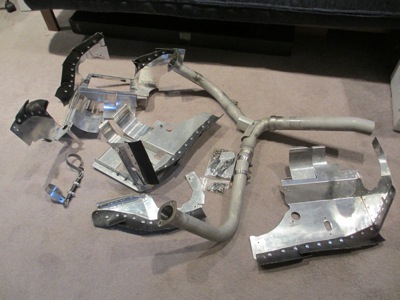
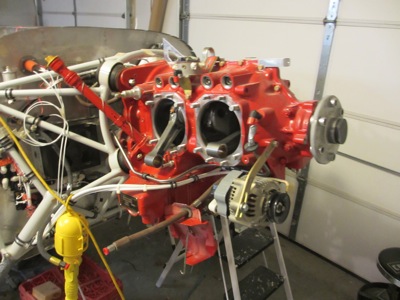
I've owned and maintained Lycoming engines before, but I've never done any serious maintenance like removing a cylinder. I decided to hire out the job to a local A&P, from whom I learned a lot about how it's done. Definitely worth the cost of hiring a pro to show you the ropes the first time when you're working on an engine that costs as much as a nice new car. But now look how sad it looks with the jugs removed:
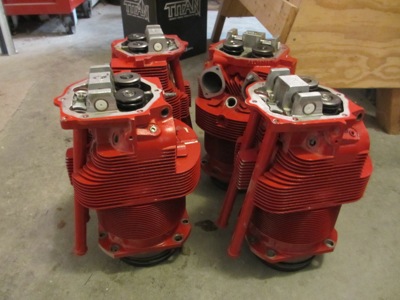
Four bad cylinder assemblies, ready to be shipped back to where they came from. If you've never seen an air-cooled aircraft engine cylinder up close, these are about the size of a gallon of milk (I guess that's why they call them jugs?) and weigh maybe twenty pounds apiece. I saved the valve covers, pushrods, rocker arms, injector nozzles, and wrist pins – everything else including the pistons and rings goes back and gets replaced with new parts.
Amazing how many little things have to be removed before you can take the cylinders off:
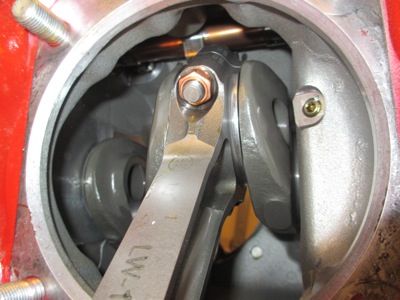
On the bright side, pulling the cylinders gives me a chance to look inside the engine for corrosion. I was slightly worried that some internal rust might have started during the (sadly) extended period the engine has been sitting in my non climate controlled garage, but happily everything I can see inside the engine looks shiny and new.
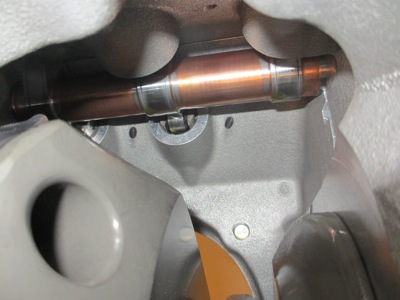
The ever-critical camshaft looks great as well. Once the cam starts to go, you're looking at a five-figure engine teardown. Luckily that date appears to still be a long ways off.
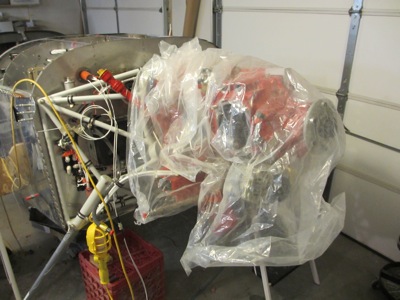
I boxed up the old cylinders and sent them on their way. Meanwhile I threw a tarp over the engine to keep stuff from falling into the open cylinder holes while I'm waiting for new jugs to arrive.
Although it is without a doubt an unfortunate backwards step, this chore is actually also a bit exciting, since it means that once the new cylinders are installed, I'll be able to start attaching things to the engine for the last time. Think positive

Manifold pressure plumbing

Sunday, September 2nd, 2012

A while back (several years ago, in fact) I installed a manifold pressure fitting on the firewall, using the location referenced in the plans. Fast forward to today, through several iterations of equipment selection, and I no longer have a need to bring the manifold pressure plumbing through the firewall. I do, however, need to transition from the heavy Aeroquip hose to something lighter, and also to plug the now-unnecessary hole in the firewall.

I chose to tackle both at once by modifying the bulkhead tee fitting that I previously installed through the firewall. I cut off the right angle leg, filed it flat (this was before I had a milling machine, or else I'd have used that) and tapped the hole for 10-32 threads. Then I installed a similarly threaded quick connect air fitting using Permatex #2.

Here's the modified air fitting re-installed in the firewall. The aft side, not shown here, is blocked off with an AN929 cap. This effectively turns the former tee fitting into a firewall-mounted right-angle hose-to-tube adapter.

This is a wider shot of the area in question. Manifold pressure is conveyed from a port on the back on the #3 cylinder to the fitting/adapter on the firewall via a hose, which is strain-relieved via an adel clamp attached to the engine mount. This originally had two attach points; I may hook the other one up again someday if it appears necessary.

From the firewall connection, the manifold pressure hookup transitions to 1/4" nylon tube, seen here as a black stripe because the camera wouldn't focus where I wanted it.

I attached a quick-connect tee fitting to the firewall using a simple aluminum tab affixed to an existing bolt hole. The middle leg of this fitting will eventually connect to the manifold pressure input on my ignition system (more on that in a future update) but for now it's just plugged. A pair of adel clamps keeps the manifold pressure tube from rubbing on the oil pressure hose and vice versa.

Here you can vaguely see the entire route of the black plastic manifold pressure line, from the hose transition on the starboard side, across the firewall through a tee to the sensor manifold on the pilot's side. In retrospect it's not exactly how I might have chosen to hook it up had I known I wouldn't need to bring it through the firewall, but it's not a bad arrangement regardless.

Engine pressure sensors

Sunday, September 2nd, 2012

The electronic transducers that sense engine oil pressure, fuel pressure, and manifold pressure are all mounted on a manifold on the left side of the firewall. I ran the wiring to all three, then used some brass air fittings and the compressor to test the oil and fuel pressure sensors. Manifold pressure is easier to test since you can just compare the readout to ambient air pressure.

I used Permatex #2 to seal the sensors, plugs, and fittings as I screwed them into the manifold. The oil pressure sensor is hung off the side of the manifold, since the oil pressure switch (which drives the Hobbs meter and the low oil pressure warning light) is much too big to be placed anywhere else other than cantilevered straight out from the firewall. In fact, I discovered to my chagrin that the oil pressure sensor doesn't quite fit either – the radius is too big by an eighth of an inch – but I have a plan for that…

In classic style, I used this little challenge as an opportunity to buy a new tool. Seen here is a vertical milling table attached my lathe, which turns it into a very small milling machine of sorts:

I cut a piece of 3/16" aluminum bar stock, match drilled it to the transducer manifold, and then bolted/clamped it to the new milling table and milled out some lightening holes:

It's not perfect, but it's not bad for my first real part made using a milling machine. It's quite light, since most of the material in the heavy bar of aluminum has been milled out.

Now the manifold can be spaced out from the firewall, allowing the oil pressure sensor to fit:

…just like this:

I secured all the sensor wiring with tie wraps. Later I'll connect the three wires for the oil pressure switch.

The milling conversion attachment for the lathe wasn't all that expensive, but I have a feeling that it is going to end up costing me a more in the long run. Now that I've successfully made a useful part on a mill – something I never thought I'd be able to do – I'm already having impure thoughts about upgrading to a larger and more capable machine. I wonder if Mary would notice if I put a Bridgeport in the guest bedroom?