Archive for the ‘Firewall Forward’ Category

Installed firewall recess & engine mount

Sunday, January 21st, 2007

Mary had to work today, so contrary to her orders I spent some time in the cold garage warm and healthful airplane workshop. I riveted the firewall recess in place for good, which let me check off another longstanding to-do item.

For this riveting task I used my new tungsten bucking bar. Man, I wish I'd bought this thing a long time ago. It's really a night and day difference compared to the steel bars I have, because it's made of such dense material. It's so hardcore that you can practically just wave it in the general direction of the rivets and they buck themselves out sheer terror. It was not inexpensive, but it really is an excellent tool.

Believe it or not, the steel bar on the left actually weighs less than the bar on the right. Can you guess why? That's right, it's because the one on the right is made of delicious tungsten.

Then I bolted on the engine mount and torqued all the nuts.

I put the cotter pins in too, which practically guarantees that I'll find a reason to take the engine mount back off the fuselage next week.

More FWF parts arrived

Saturday, January 20th, 2007

I'm currently trying to fight off a sinus infection, so I've been forbidden by the girl to spend time in the cold garage until further notice. However, while she was at the gym I snuck down and retrieved a couple big boxes that arrived earlier this week, which I haden't yet had a chance to open. The first box contained about half of the items in Van's firewall forward kit. I'm ordering stuff ala carte and in stages, since I'm sure I won't need all the stuff in the FWF kit. Also, the cat was very interested in helping.

A second big box contained my Vetterman exhaust system. From what I can tell the welding is first rate.

Opening all these boxes generated a tremendous amount of packing paper, which was also of great interest to the cat.

Sealed firewall recess

Tuesday, January 16th, 2007

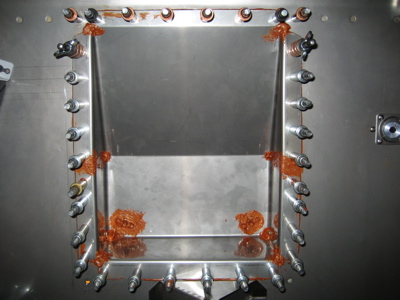
I used high-temp RTV to seal the firewall recess along its mating flanges and in all its little nooks and crannies. Once it's cured I'll touch up any missed spots and rivet it in place for good.

The flavor of RTV I used was Permatex Ultra Copper, which has apparently replaced the red kind as the non-corrosive, high-temperature goo of choice. At least that's what the guy at the auto store said when I went in to pick up another tube to finish up the firewall. I decided not to use Biotherm here, because there were a lot of gaps to fill and Biotherm seems to be less rubbery and more saggy than RTV.

More eyeballs

Thursday, January 11th, 2007

In order to mount the eyeball for the firewall cable, I had to move the hole up and towards the left side of the airplane by 1/4". There's a doubler on the aft side of the firewall that would have interfered with the eyeball mounting otherwise.

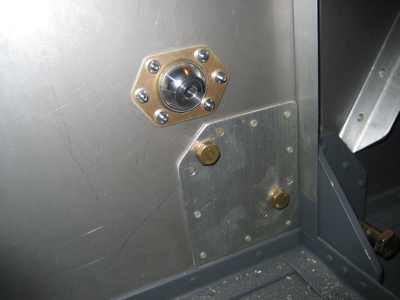
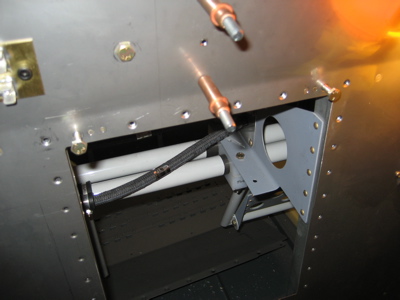
From the cockpit side, you can see the offending doubler. The funny thing is that this is where the fuel pump is mounted if you have a carbureted engine, but since my engine is fuel injected nothing ends up mounting here. I put in a couple of short bolts just to plug the holes.

Here's the prop cable eyeball, mounted near the one for the mixture cable.

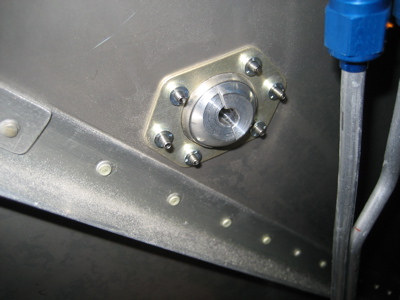
On the inside, the nut ring nestles right up to the diagonal firewall stiffener.

While I was at it I installed the two nutplates just above the firewall recess, where the oil pressure line clamps to the firewall.

I think that's everything I need to do to the firewall before I rivet on the recess and bolt the engine mount on permanently. I'm going out of town this weekend, but the next big goal is to get the airplane rolling on the gear. Stay tuned…

Playing with eyeballs

Wednesday, January 10th, 2007

The plans have you pass the engine control cables through the firewall using plastic snap bushings, but I since I wanted something a lot more chafe- and fire-resistant I decided to use metal "eyeball" swivel fittings. These come in two basic varieties – one where the halves of the ball are retained only by a twist-on locking ring, and one where there are six screws holding everything in place. I've seen instances where the no-screw variety has come apart unexpectedly, so I decided to go with the seven-hole eyeballs despite the fact that they are a little more work to install.

Also, after the big deal I made about aluminum versus steel on the firewall, I was happy to see that the seven-hole eyeballs are available in steel as well as aluminum. However, after further investigation it became obvious that the steel flavor can only be enlarged up to 0.26" because of they way they're built (look at the photo on Van's website and you'll see why). The engine control cables are more like 3/8", so the steel eyeballs are out. Oh well, maybe since the aluminum balls are solid chunks of metal, not hollow, it'll take them longer to melt…

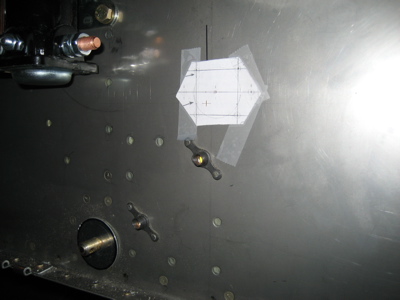
Anyway, I received three of the seven-hole eyeballs in my latest Aircraft Spruce order, so I decided to try installing one tonight. First you use a punch to mark the hole locations using the handy template they send you. I put my shop light on the other side of the firewall to help me line up the center pilot hole.
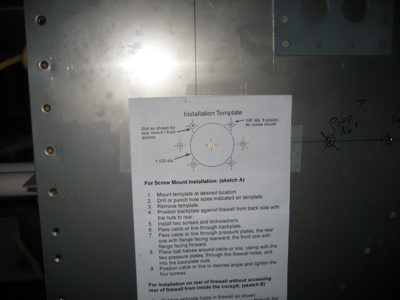
After drilling the screw holes, I used a Greenlee knockout punch to make the 1 1/8" center hole.

Those punches are expensive (on the order of fifty bucks per size) but they make pretty nice holes that need minimal deburring.
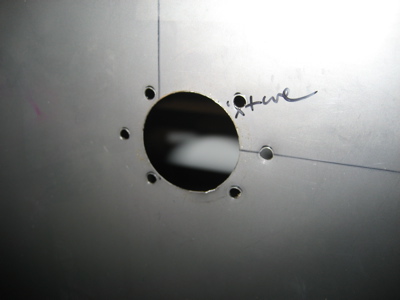
Here's the finished product. Four of the screws hold the ball retainer ring to the firewall, and the other two screws keep the nut ring on the back in place.

Viewed from the cabin side of the firewall, you can see the nut ring. Simple as can be.
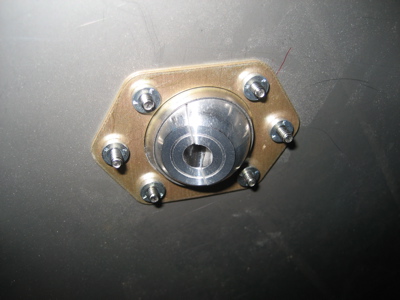
I'm pretty happy with these fittings – I think they should work just fine. It should be easy later on to adjust them without needing to find somebody to help me put a wrench on both sides of the firewall. It's like two more minutes per eyeball to install, but the payoff in terms of secure attachment and ease of adjustment seems worth it to me.