Archive for the ‘Engine’ Category

Removed engine cylinders

Saturday, January 5th, 2013

One of the things I've been putting off for as long as possible is dealing with SB08-1, the dreaded ECI service bulletin. The gist of it is that if you are unlucky enough to have a cylinder that came from a bad batch, it must be replaced with a new one, lest it develop a crack in-flight with spectacular and exciting results. Imagine how lucky you have to be for all four of your cylinders to be bad, like mine are! Fortunately I was able to work out a warranty deal with the company, but it's still going to be an expensive fix. At least I'll come out ahead of where I'd be if I had to buy four new cylinders at full retail price.

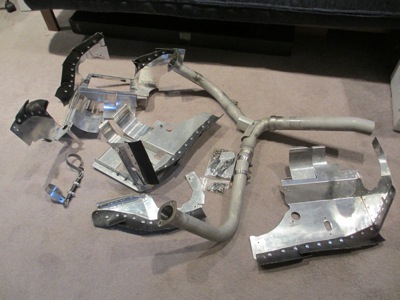
I waited until I couldn't make any further progress on the engine without starting to attach things semi-permanently, then finally gritted my teeth and started unbolting things. I took off the baffles, dropped the exhaust (and sent it back to the manufacturer to fix a different potential cracking issue), pulled the spark plugs, and so forth.
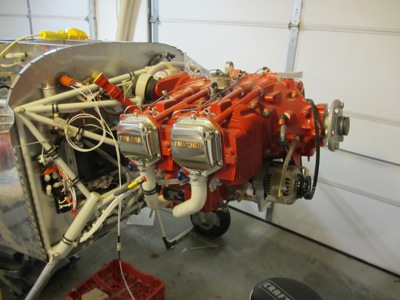
One of the many piles of stuff that came off the engine:
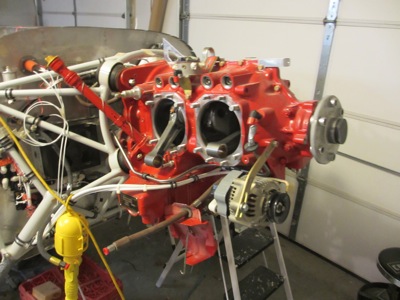
I've owned and maintained Lycoming engines before, but I've never done any serious maintenance like removing a cylinder. I decided to hire out the job to a local A&P, from whom I learned a lot about how it's done. Definitely worth the cost of hiring a pro to show you the ropes the first time when you're working on an engine that costs as much as a nice new car. But now look how sad it looks with the jugs removed:
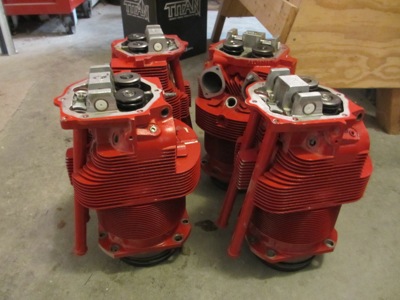
Four bad cylinder assemblies, ready to be shipped back to where they came from. If you've never seen an air-cooled aircraft engine cylinder up close, these are about the size of a gallon of milk (I guess that's why they call them jugs?) and weigh maybe twenty pounds apiece. I saved the valve covers, pushrods, rocker arms, injector nozzles, and wrist pins – everything else including the pistons and rings goes back and gets replaced with new parts.
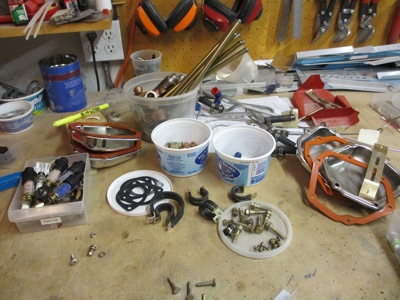
Amazing how many little things have to be removed before you can take the cylinders off:
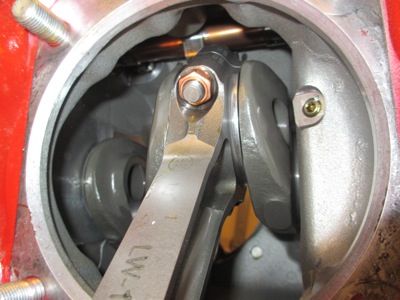
On the bright side, pulling the cylinders gives me a chance to look inside the engine for corrosion. I was slightly worried that some internal rust might have started during the (sadly) extended period the engine has been sitting in my non climate controlled garage, but happily everything I can see inside the engine looks shiny and new.
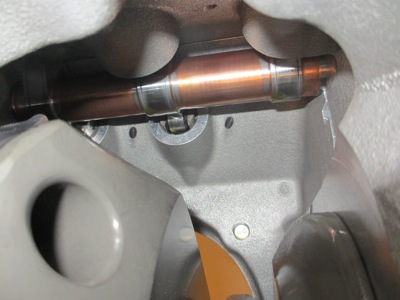
The ever-critical camshaft looks great as well. Once the cam starts to go, you're looking at a five-figure engine teardown. Luckily that date appears to still be a long ways off.
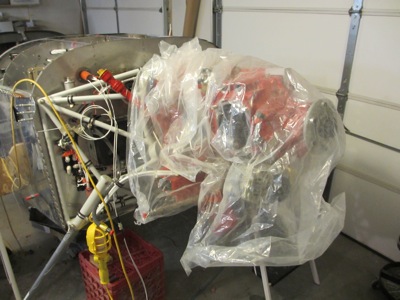
I boxed up the old cylinders and sent them on their way. Meanwhile I threw a tarp over the engine to keep stuff from falling into the open cylinder holes while I'm waiting for new jugs to arrive.
Although it is without a doubt an unfortunate backwards step, this chore is actually also a bit exciting, since it means that once the new cylinders are installed, I'll be able to start attaching things to the engine for the last time. Think positive

Desiccant plugs

Saturday, May 9th, 2009

I put in a new set of desiccant plugs in the engine this weekend… after two years of service, the old ones were starting to lose their magic ability to dry out when I put them in the oven every few months.

Sniffle valve

Sunday, June 29th, 2008

Fuel-injected Lycoming engines can sometimes experience a phenomenon wherein excess fuel drips down the induction tubes and pools in the intake manifold after shutdown. This can be a problem, since it could cause a troublesome fire during the next start. To alleviate this, you install a simple little one-way check valve in the bottom of the intake, which lets the fuel drip out of the engine onto the ground. For whatever reason, this item is colloquially referred to as a sniffle valve.

Here's a bad picture of the one I bought from Airflow Performance for a few bucks – it's basically just a normal AN fitting that's been drilled out and had a ball bearing and retainer clip inserted. Reduced pressure inside the manifold causes the ball to be sucked up to close the valve when the engine is running, but it drops down and lets the fuel drip out when the engine is shut down.

I knew from previous reading that the sniffle valve is too close to the exhaust pipes on an IO-360 with horizontal induction, so I installed it in a 45-degree brass street elbow to clear the pipes. The exact orientation of the valve is said not to matter much, as long as the ball is free to drop when the airplane is at rest. I also attached a 1/4" hose barb to 1/4" AN flare adapter, similar to the one I used for the fuel pump drain line.

I ran another 1/4" aluminum line from the firewall up to the sniffle valve, using a length of 1/4" rubber fuel hose as a flexible coupling. The forward (engine) end of the aluminum tube is ever so slightly flared to give the clamps something to work with – using a real beading tool would have been best, but I can't afford one and this is not a critical application. The aft end of the drain tube is attached to the firewall flange with an adel clamp, just like its twin the fuel drain line.

One more of the million firewall forward tasks is complete… and with that, I'm off to try and make a dent in the beer and ice cream still left over from Saturday's party.

Installed new fuel pump

Sunday, June 29th, 2008

At last, a chance to work on the airplane! Following much finagling, I managed to get the new fuel pump installed on the engine. It's pretty tricky to keep the thing aligned correctly and get the bolts started, while making sure the pump actuator lever isn't hitting the side of the pushrod way up inside the engine that actually drives the thing.

Not really visible here is the new gasket I installed between the pump and the drive pad. I couldn't get a torque wrench on the bolts – actually I could barely get a hex wrench on them with the engine installed on the airplane – so I just torqued them by feel and installed safety wire. It only took me about five tries to get the safety wire installed properly in the narrow space available.

Since replacing the fuel pump seems like kind of a big deal, I decided to make an entry in the engine logbook. It says: 0.0 hours – Original fuel pump damaged during installation – Replaced fuel pump with new Lycoming LW-15473 in accordance with manufacturer's instructions.

With the fuel pump replacement finally finished, I was now back to where I was a month ago. The next step was to hook up all the hoses, but this time around I didn't want to use a steel fitting for the drain line and risk fracturing the pump again. I decided to use a brass fitting, but I couldn't find one that I could easily substitute for the previous one. Luckily, one of the things I learned when I owned an airplane with a car engine in it – besides the most important lesson, being for goodness sakes, don't ever buy an airplane with a car engine in it – was how to make aircraft and automotive plumbing play together. Here's some 3/16" I.D. automotive rubber fuel hose, a brass hose barb to pipe thread adapter, a brass 3/16" hose to 1/4" AN flare adapter, an AN818-4D flare nut, and some Oetiker stepless hose clamps:

Down at the bottom of the firewall, the rubber hose comes off the suspended plumbing contraption that carries the dumped fuel out the back of the cowling. I really like this method of adapting cheap rubber hose to AN plumbing. Of course, I wouldn't use it for anything other than a vent line, but it's easy to make and I think it looks more professional than the plastic ice maker hose the plans specify for this application. I already had the special tool needed to install Oetiker clamps, so no problem there.

The drain line attaches to the fuel pump via the hose barb fitting, and that's that. I also installed the other three fuel hoses (input, output, and pressure) and torqued all the fittings.

Mounted fuel servo

Saturday, March 1st, 2008

Mattituck sent me a new gasket to replace the wrong-sized one they'd originally sent me with the engine, so I was finally able to bolt the fuel injection servo to the engine. I put a thin coat of fuel lube on both sides of the gasket before installing it.

There aren't really any detailed instructions on how to mount this thing, other than a drawing in the plans that shows the correct orientation. In one of the bags of stuff that came with the engine I found some 5/16" nuts and star washers, so that's what I used to attach the fuel servo to the sump. Confusingly, the Lycoming overhaul manual calls out a torque value for 5/16" nuts that's noticeably higher than what AC43-13b says to use, but it's largely a point of academic interest – even using a crow's foot, there's no possible way to get a torque wrench onto at least two of the nuts, so I just wrenched them all by feel until they were good and tight.

Looking down the business end of the air intake, you can see the four airflow pickups (or whatever they're really called) in front of the closed throttle plate. The Bendix fuel injection system is a purely mechanical system, in which the amount of fuel metered to the cylinders varies with throttle position and the rate of air flow measured at the intake. It's a simple design that's been around since the 60's, and based on my experience flying other Bendix-equipped airplanes it all seems to work pretty well if it's properly set up and adjusted.

To keep unwanted junk from getting lodged in the intake throat, I covered it up with masking tape: