Archive for the ‘Rudder’ Category

Rudder riveting

Sunday, August 7th, 2005

Since I need to wait for replacement ribs to continue with the elevators, and I got my pneumatic squeezer back from being rebuilt at Clear Air Tools, I switched back to the rudder. Here the skeleton is coming together:

I used solid rivets to attach the rudder brace to the bottom rib, but I wasn't able to get any of my squeezer yokes inside the brace in order to squash the horn-to-brace rivets, so I used the optional LP4-3 blind rivets there. I could probably have used solid rivets if I'd ground down the top corner of my longeron yoke, but who cares.

The rudder counterweight is installed in its home with nuts and screws. I wonder why this weight is pre-drilled but the elevator ones aren't…?

Here the skins have been riveted to the spar.

Next step is the trailing edge, for which I obtained a big piece of 1/8" aluminum angle from the aviation department at Ace Hardware. Clamped to the rudder trailing edge, match-drilled, and held with a cleco in every hole, it will serve to keep the trailing edge perfectly straight while I glue it together and then rivet it.

But that will have to wait for another night since Mary wants to take me for walkies in the park.

Primed rudder parts

Monday, July 18th, 2005

Today I countersunk the rudder trailing edge wedge, and prepped and primed the rudder parts. Not very interesting, but here's a shot of them resting after being sprayed:

So much of this project is this type of mindless stuff – deburr, dimple, prep, prime. Which is okay, since I can do a little bit every day after work when I'm brain dead.

Now I have the rudder parts ready to rivet together, but I'm sort of stuck until I get my squeezer back from the rebuild place.

Rudder parts prep

Sunday, July 17th, 2005

The rest of this weekend was spent deburring and dimpling the rudder parts. Here's a shot of my solution for how to dimple the aftmost holes in R-903… pop rivet dimple dies with the nail inserted from the outside, and washers to take up the gap:

The lead brick is attached to the counterweight rib with #10 screws. Dimple dies for a screw that big can be expensive, so some builders use their #8 dies and mash the screw in there to expand the dimple. That sounded like an opportunity for a stress riser and an eventual crack to me, so I found some cheap #10 dimple dies on eBay and used them to make the proper dimple. No big deal. The lead then is countersunk to fit the dimple – it's soft enough that I was able to use my deburring tool to do it.

Trimmed replacement rudder brace

Saturday, July 16th, 2005

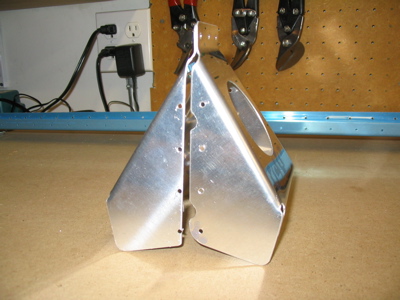
Here are the old and new rudder horn braces. The new one is on the right – notice how much extra edge distance there is if you don't trim along the prepunched guide holes. I used my Dremel tool to make little stress-relieving scallops where the guide holes were.

Stupid Rudder Brace

Wednesday, July 6th, 2005

What's this? It's the R-710 rudder brace I trimmed and installed on Monday. Notice the unacceptably small edge distance on the brace-to-skin rivet holes. I did some web searching and found that it's common to have this problem if you follow the plans and trim along the prepunched guide holes. Would have been nice to have this pointed out in the instructions – "Trim the R-710 rudder brace, but not as shown on the plans!" – but I guess since it's only a nine dollar part it's not the worst thing ever to replace it. Too bad it won't arrive till next week sometime… Van's has good prices and service but sometime it seems like it takes an eternity to receive an order.