Archive for the ‘Empennage’ Category

The tail is done

Sunday, October 16th, 2005

…well, as done as I plan to get it for now. The elevator hinges are complete and the trim linkage is correct. I'm saving the fiberglass tips for later, as stated previously. I also decided to wait to finish the rudder hinges until I have the vertical stabilizer mounted on the airplane, since it will be way easier to get everything lined up then (the rudder doesn't lay down nice and flat on the workbench because the rudder horns stick out both sides).

Next step is to get the workshop ready for the QB stuff. The fuselage I think I'll just put on some sawhorses. The wings demand some kind of storage rack to sit them on, but I sort of need the wings here so I can trace the airfoil contour so I can make the rack that I need to store the wings on… what I may end up doing is laying the wings down on some styrofoam insulation when they arrive, long enough to get the real wing rack made. We shall see.

Elevator center bearing

Friday, October 14th, 2005

Here's what 12 bucks plus shipping gets you from McMaster-Carr. Actually, their site was a breeze to navigate and their shipping was both prompt and reasonable, so I can't really complain.

Unfortunately, this drill bushing was just a few thousands too big to fit through the elevator bearing. I was going to schmooze some time on my friend's metal lathe, but then I figured out that hand drill + belt sander = poor man's lathe. I just chucked the bushing in the drill and held it up to the belt sander, and turned it down into a sort of bullet shape that fit snugly and centered-ly in the elevator bearing. Then I chucked it in the drill press and turned it against some emery cloth to smooth out the surface again so it wouldn't get stuck.

The first elevator gets put on the stabilizer with Avery's temporary pins, and it's held in trail by clamps on the counterweight arm. Then the drill bushing gets inserted in the center bearing, and the pilot hole is drilled right through.

Then the pilot hole is enlarged in steps up to a C size drill, and then reamed to exactly 0.250 inches.

Hooray, a bolt through the bearing fits right through the new hole and the elevator pivots perfectly.

The above process is repeated for the other elevator, and now the center pivot is complete.

Now all I have left to do on the tail (other than fiberglass, which I've decided to save until later so I can do all the obnoxious itchy stuff at once) is tighten up the rod end bearings on the elevators, install and tighten the corresponding ones on the rudder, and play with the trim tab linkage a bit.

Installed elevator trim servo

Wednesday, October 12th, 2005

Tonight I finished installing the elevator trim servo motor. I had to cut the pushrod to length and install the clevises, and then with the help of a drill battery… it's alive!

This is the first part of the airplane able to move under its own power. I'm stoked. (do the kids still say "stoked"?)

I had to enlarge the aft end of the notch to clear the pushrod when the trim tab is in its full up position (full nose down trim). I may need to file it out a little more later, but this is okay for right now.

Here's a shot of the attach hardware, just to remind myself that I did install the cotter pins.

Elevator hinges

Sunday, October 9th, 2005

The in-laws were in town so I didn't do any work on Friday or Saturday, but today I was able to spend the afternoon out in the garage, building airplanes and enjoying the nice weather. I rolled the leading edge of the right elevator as best I could, and since I figured I'd have a similar puckering problem on this elevator I went ahead and doubled up on the rivets for the middle and outboard sections while I still had it clecoed together:

That made it turn out pretty nice. I think the problem with the elevators is that the skin is too stiff and the spar is too narrow at the tip to get a nice bend out there; I probably also could have used a smaller-diameter broomstick and gotten better results. It turned out acceptably though:

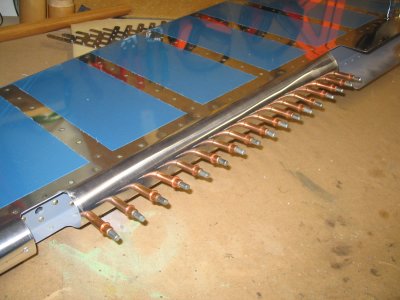
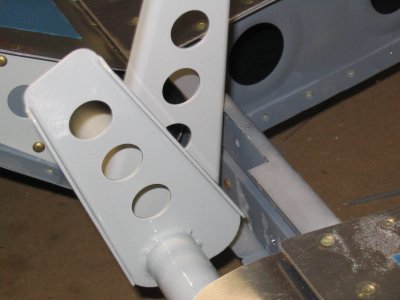
Then I hauled the horizontal stabilizer out of storage, and went to work getting the elevator hinges set up:

I used Avery's temporary alignment pins to hold the elevators in place while I worked – way easier than putting bolts in and out. I must have had the elevators on and off a half dozen times today, and these pins made the job a lot simpler. I also used Avery's rod end bearing installation tool to (surprise) install the rod end bearings, although if I'd been feeling industrious I could have made my own out of PVC. I don't actually remember ordering the Avery one, but I found it in my toolbox so I must have been planning ahead during some previous tool-buying spree. Or maybe it was the tool fairy…?

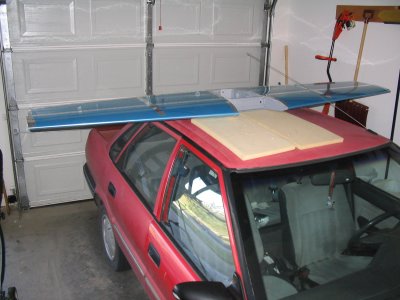
Behold the newest addition to our country's military arsenal – the F/A-RV-7 Stealth Attack Geo!

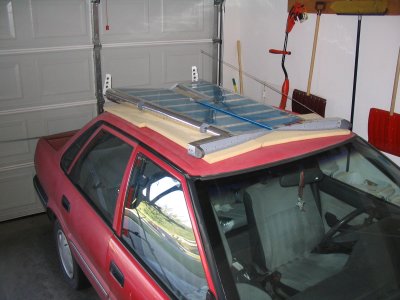
Here is another shot, this time with the wings folded for supersonic cruising flight!

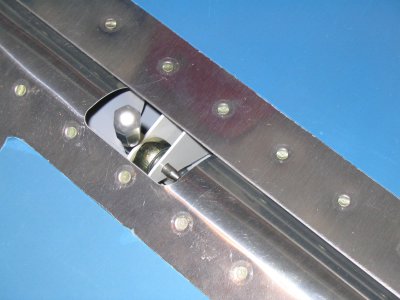
The elevator counterbalance arms were way too long to fit the cutout in the stabilizer skin – I think Van's must have changed the elevator design at some point without changing the HS to match, because I've read about this problem happening to a lot of builders.

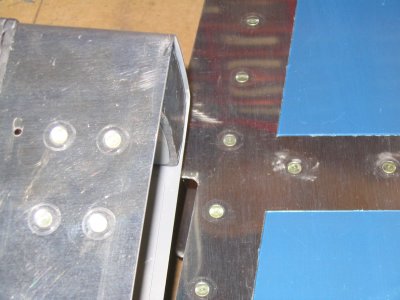
I trimmed about 3/4" and now everything fits together. This will be cleaned up and deburred after I take the elevators off again.

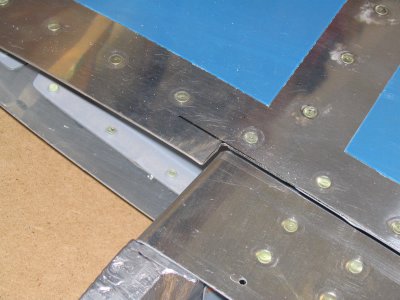
I also had to notch the lower flange of the HS spar, per the plans, to clear the elevator horns and allow enough down-elevator travel.

Here's the HS with both elevators temporarily attached. This thing is huge – over eight feet wide. Sweet.

Finished left elevator leading edge

Thursday, October 6th, 2005

I had a little time after work tonight, so I finished the leading edge of the left elevator. Here it is, completed, sitting on the floor in the unused bedroom we call the "airplane room":

I didn't like the way the skins were puckered up between the rivets in some places, so I doubled the number of rivets in the leading edge along the middle and outboard sections. That made the skins lie down and look nice.