Archive for the ‘Electrical/Panel’ Category

Garmin G3X Panel

Wednesday, March 11th, 2009

I borrowed some display units from work so I could wire up the interconnections between them. And since it's not a secret anymore (and I have permission) I couldn't resist taking some beauty shots:

It's kind of weird seeing the result of many months worth of effort at home and at work converging in the same place at last. Pretty, isn't it?

Wiring

Sunday, March 1st, 2009

Did some wiring here and there, which doesn't photograph very well. I am starting to run the wires for the three cockpit displays, which you might sort of be able to see if you squint.

I also spent more time on my wiring diagrams… you could say that I am being overly anal about getting all the details right, but my goal is for the schematics to be complete enough that I can come back years from now and not have to rely on memory to figure out what's connected to what.

Rocker switches

Sunday, February 22nd, 2009

The Honeywell AML34 rocker switches I'm using have separate switch operators – that's the part that you actually flip back and forth. I sent them out to be engraved a while ago, and I finally got around to installing them tonight. They look excellent:

These will eventually be backlit by internal LEDs, which should be pretty sharp looking.

The ignition and aux battery switches got the label treatment as well. Of course I didn't engrave the Cessna split master switches, since they're all-in-one units. I'll have to have a placard made to label the master switches and breakers.

I also spent a bunch of time cleaning and organizing the garage, but you probably don't want to see pictures of that.

Headphone jack brackets

Saturday, February 21st, 2009

While working on the audio wiring, I got to the point where I needed to hook up the jacks for the headsets… and realized that I had made absolutely no plans for where to put them or how to mount them. Man, I really wish I had considered the headphone jacks when I was doing all that elaborate panel planning.

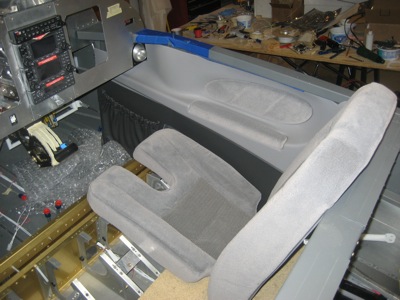
There are lots of different ideas about the best place to locate the headphone jacks… I won't repeat all the arguments, but I will mention that in my RV-9A they were in the baggage compartment, which I really hated. On this airplane, I've decided to put the jacks in the traditional location at the lower outboard corners of the panel. To figure out the clearances involved, I got out the air vents and the interior side panels (mighty nice looking, I must say).
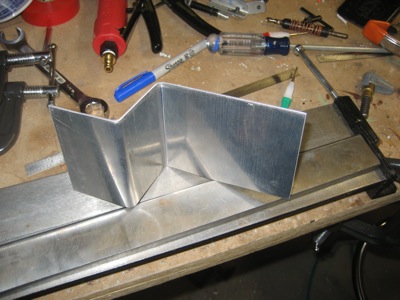
I dug a couple pieces of 0.050" alclad out of my scrap bin and bent them into Z-shapes using my new and improved bending brake.
I match-drilled the brackets to the air vent mounting holes, and cut a big hole in the middle of each one.
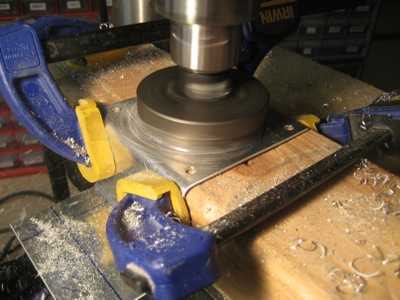
…but since my biggest Rotabroach cutter is 2 1/2" inches and I needed a 2 3/4" hole, I had to expand the radius with a rotary file.
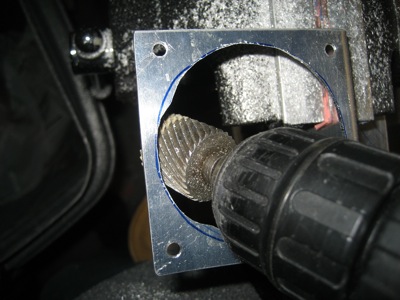
It's not pretty, but it will be hidden so I don't care.
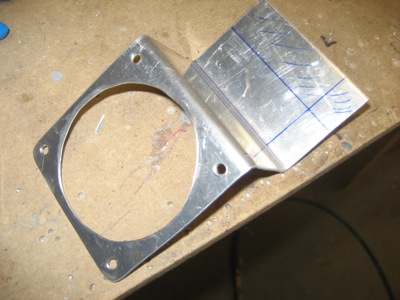
Two completed brackets for headset jacks. Each one has two holes for the traditional mic and phone plugs, and one for the combined Bose mic/phone/power connector. The odd taper is necessary to provide clearance for the contour of the interior side panel.
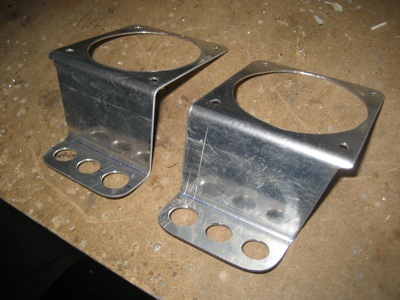
Here's a test fit on the passenger side. The jacks are nicely recessed, out of the way but easy to reach. The headset plugs ought to be fairly well protected from being stepped on by clumsy passengers. The bracket flexes a bit when inserting or removing the plugs, but I don't think it's going anywhere. I'll paint it black later.
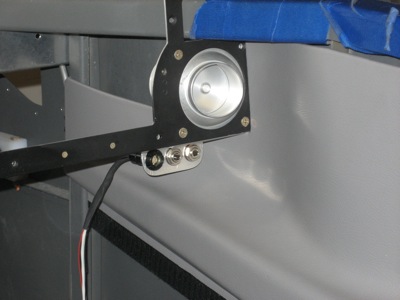
Here's a view from the other side of the panel. The bracket is sandwiched between the panel frame and the air vent's mounting flange.
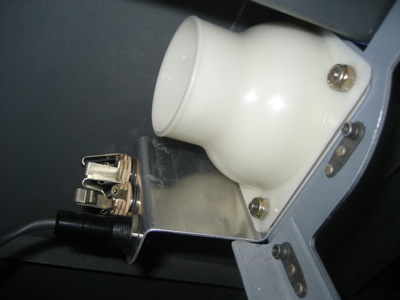
Well, now I can actually start on wiring the headset jacks. If I had done a better job of thinking ahead, I could have maybe come up with a better solution for mounting them, but this turned out mostly okay.

Cabin speaker

Monday, February 16th, 2009

Between skiing and trying to get over the resultant and inevitable cold, my weekends have been severely lacking for airplane building time lately. Happily, I did manage to get a little work done today while staying home from work trying to recuperate.

I bought this little low-profile speaker at some point, with the intention of using it as my cabin speaker. Not everybody puts a speaker in (after all, you can't hear it in flight) but I find them useful for listening to ATIS and so forth before starting the engine. Plus, if I have a working cabin speaker I can verify my radio audio wiring without having to make a decision about where I want to put my headphone jacks just yet.

Where was I… oh yeah. I made this little speaker bracket out of a piece of scrap alclad from my junk pile:

The bracket is riveted to the underside of the F-705F channel, slightly to the starboard side of the flap motor housing. I soldered a few inches of wire to the speaker, attached a molex connector, and screwed it to the bracket. The speaker is hidden, but should be easy to hear once I finish wiring it.

By the way, to make this bracket I used my Harbor Freight bending brake, which works 100% better since Scott used his milling machine to round off the sharp corner on the nose of the die. Thanks Scott.