First flight

August 8th, 2024

Nothing left to do but to see if it flies:

Obligatory victory grin:

Overall I'm happy with the outcome of the first flight. The objectives were to verify controllability, check for a functional airspeed indication, explore low-speed handling, and start breaking in the engine. Overall the plane flew great, with no bad habits or heavy-wing tendencies, needing only a slight amount of rudder to keep the ball centered. Mostly I just droned around a few thousand feet above my home field, keeping an eye on engine temperatures. I have a short list of things to check before further flight, but as first flights go this one was pretty trouble-free.

Wiring repair & fuel filter service

July 21st, 2024

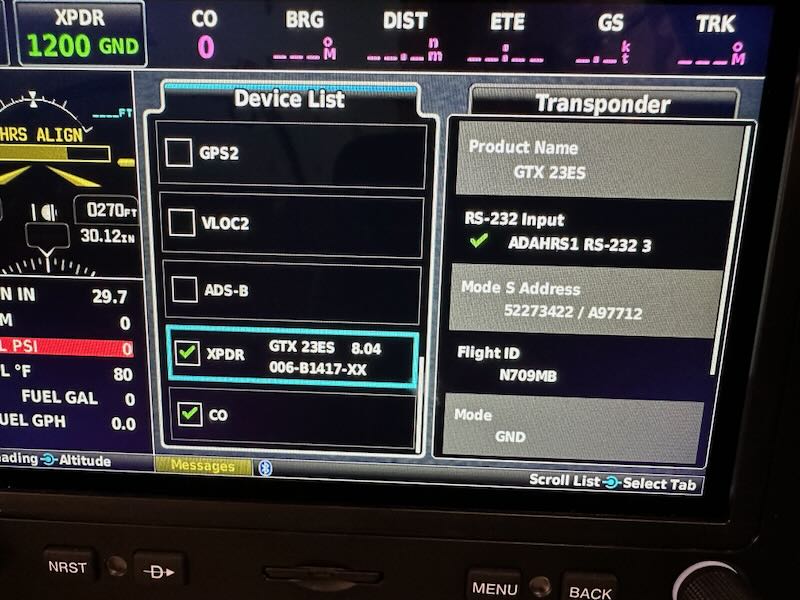
Frustratingly, during the final reassembly and checkout prior to first flight, my transponder suddenly quit working:

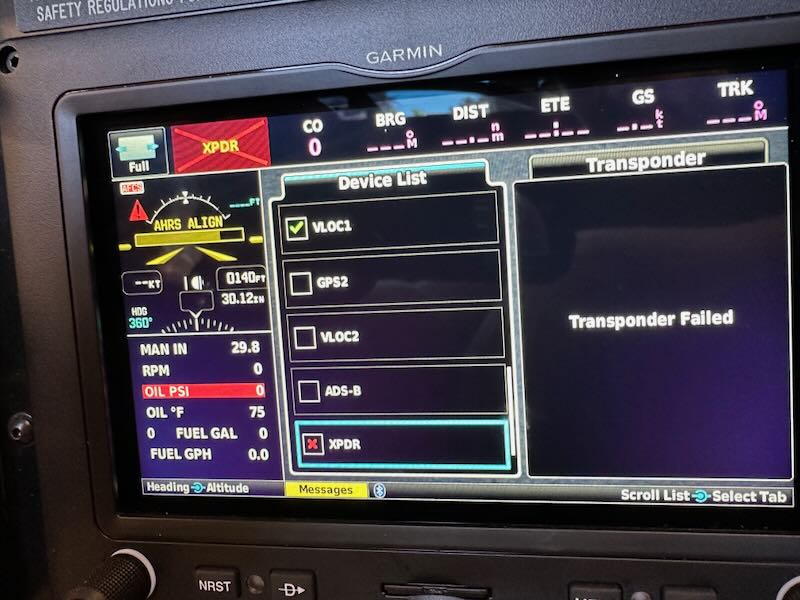
I discovered that the fuse had blown, and furthermore that the power wire to the transponder was shorted to ground somewhere downstream of the fuse block on the subpanel. I wanted to rule out a problem with the unit itself, so I went to the trouble of pulling up the baggage floor and removing the transponder from its rack – a process which also required removing the lower-aft baggage bulkhead. Sure enough, the transponder tested okay on the bench, and none of the wiring aft of the rear spar looked like it had chafed on anything:

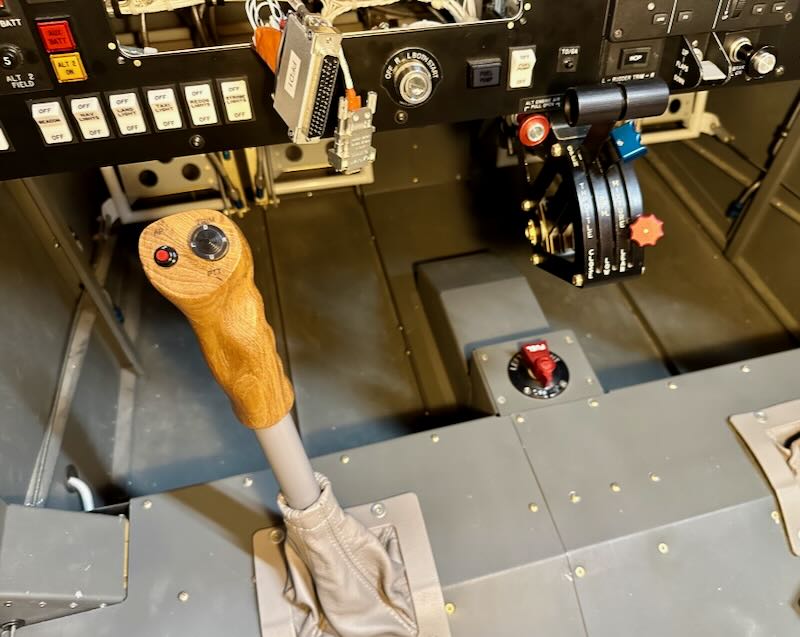
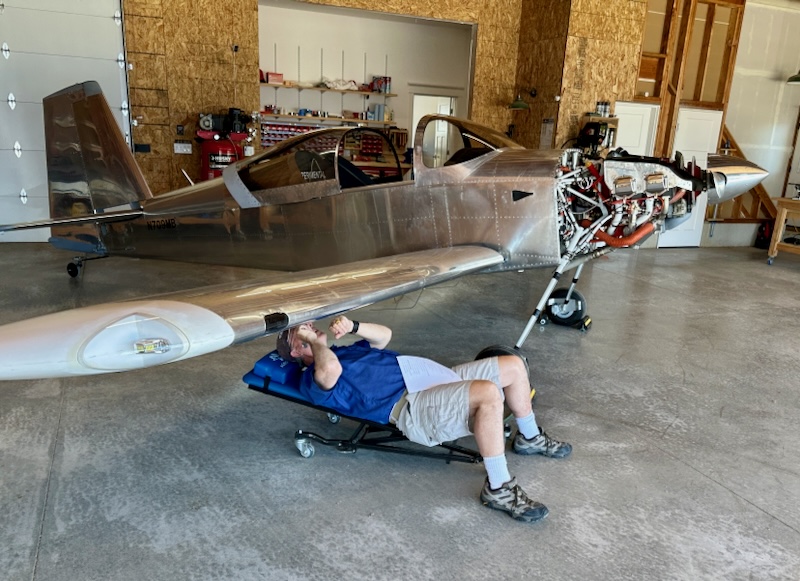
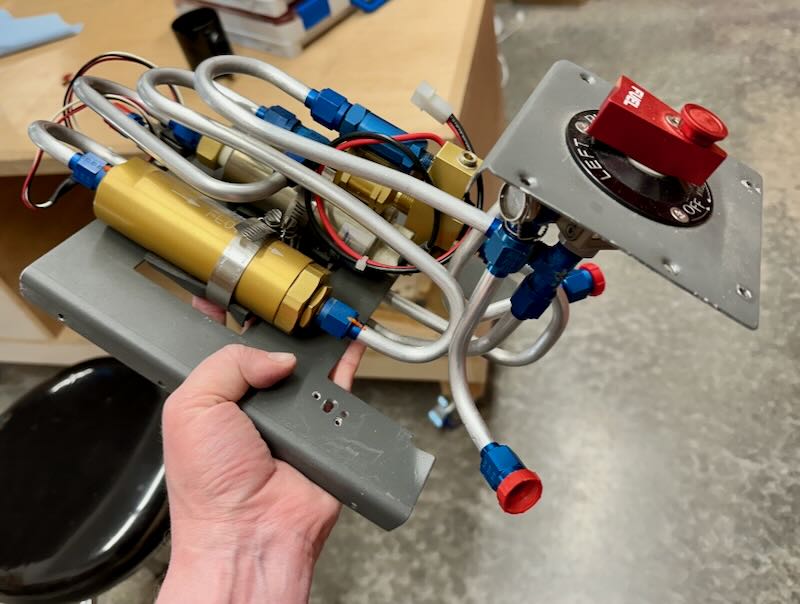
I was hoping the problem wasn't in the center tunnel, as all the wiring that runs through that area is really, really difficult to access. Instead I had a hunch the issue was forward of the spar, so to be able to inspect the wiring I pulled the whole fuel pump/filter/valve assembly:

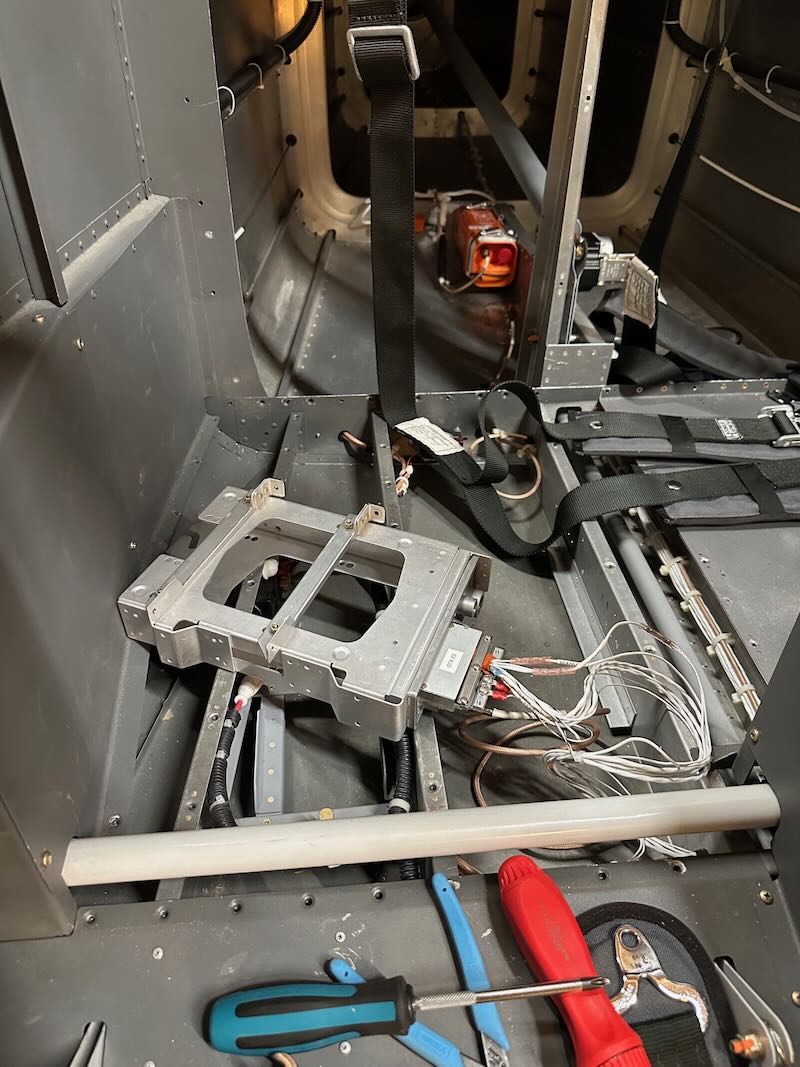
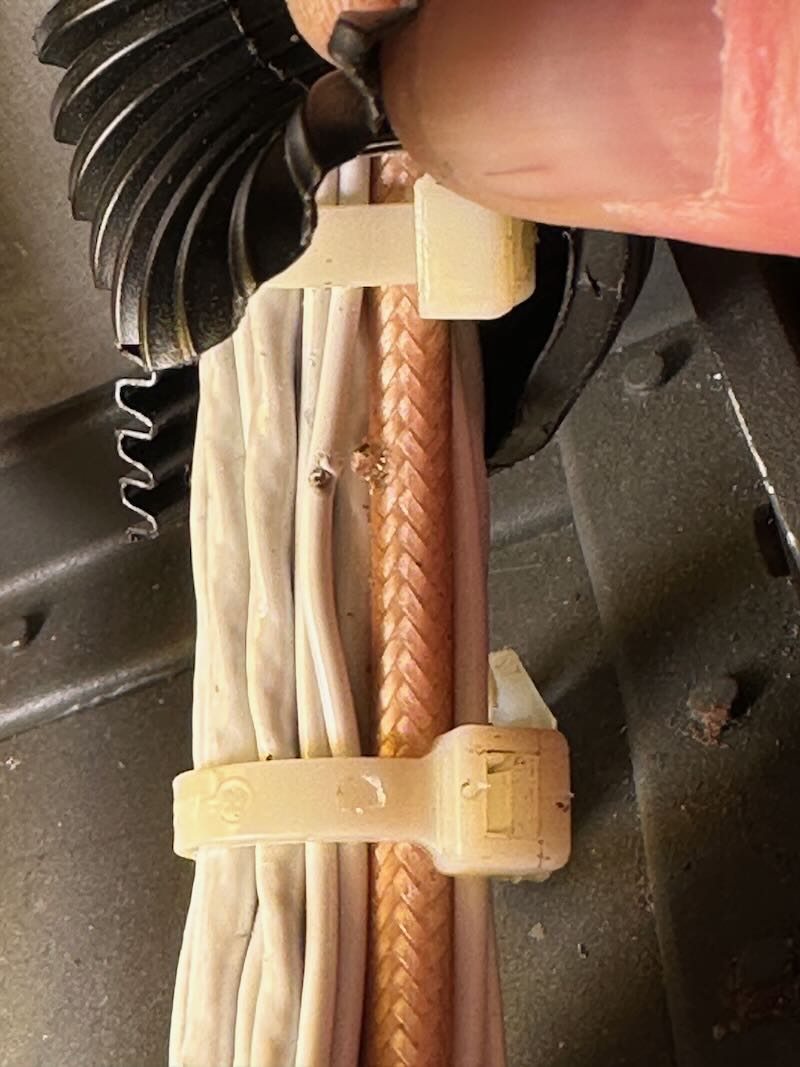
None of the wires normally hidden underneath the fuel plumbing looked suspect, so I removed the forward cabin cover, and that's where I found the culprit. Way up by the firewall, one of the screws securing the F-982E access plate to the F-782C center cabin cover had penetrated a wire bundle:

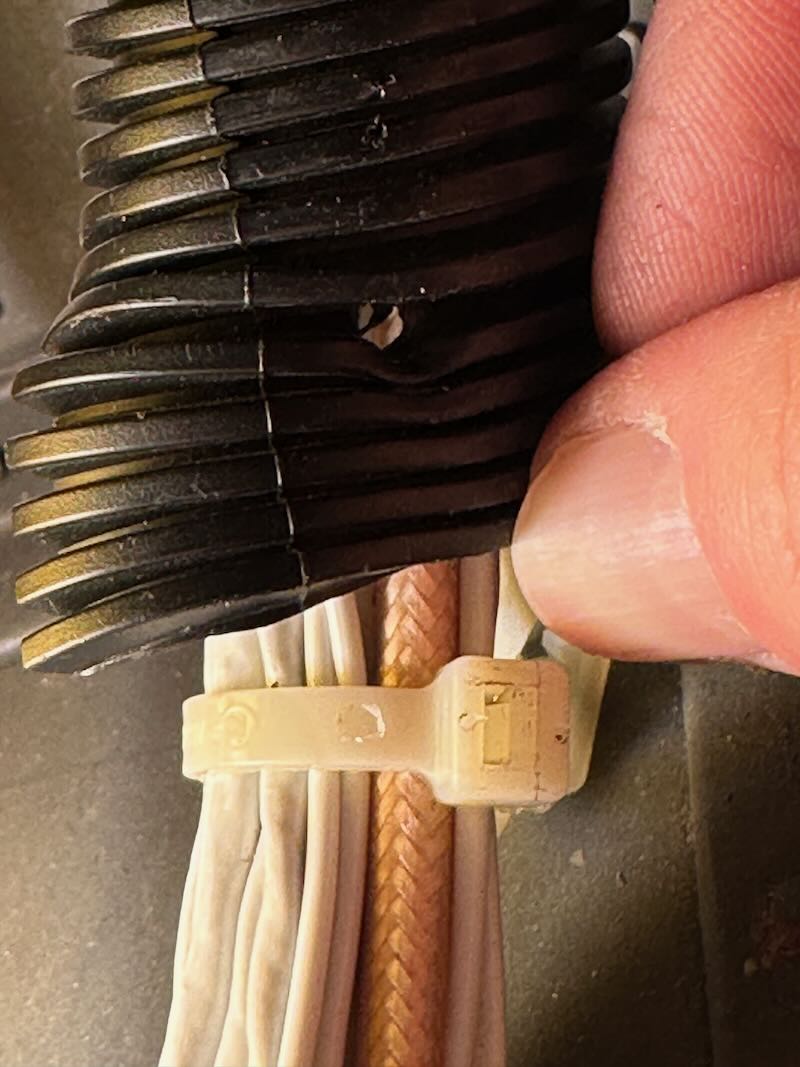
The reason I suspected the problem would be in this area is that I hadn't previously installed the center cabin cover for years, so it was the only new variable that was likely to have contributed to the sudden appearance of electrical issues. Sure enough, the offending screw chewed up the power wire to the transponder, and also chafed through the outer insulation jacket on an adjacent antenna cable, creating an intermittent short circuit:

This was technically a simple repair: I just spliced the power wire and fixed the coax insulation with some silicone tape. The difficult part was actually getting my hands and eyes on the damaged wires, since they are way, way up in the front of the footwell. I also didn't get a picture of the finished repair, since I couldn't reach my phone while stuck with my head under the panel. But after fixing the wiring and replacing the fuse, the transponder is once again working:

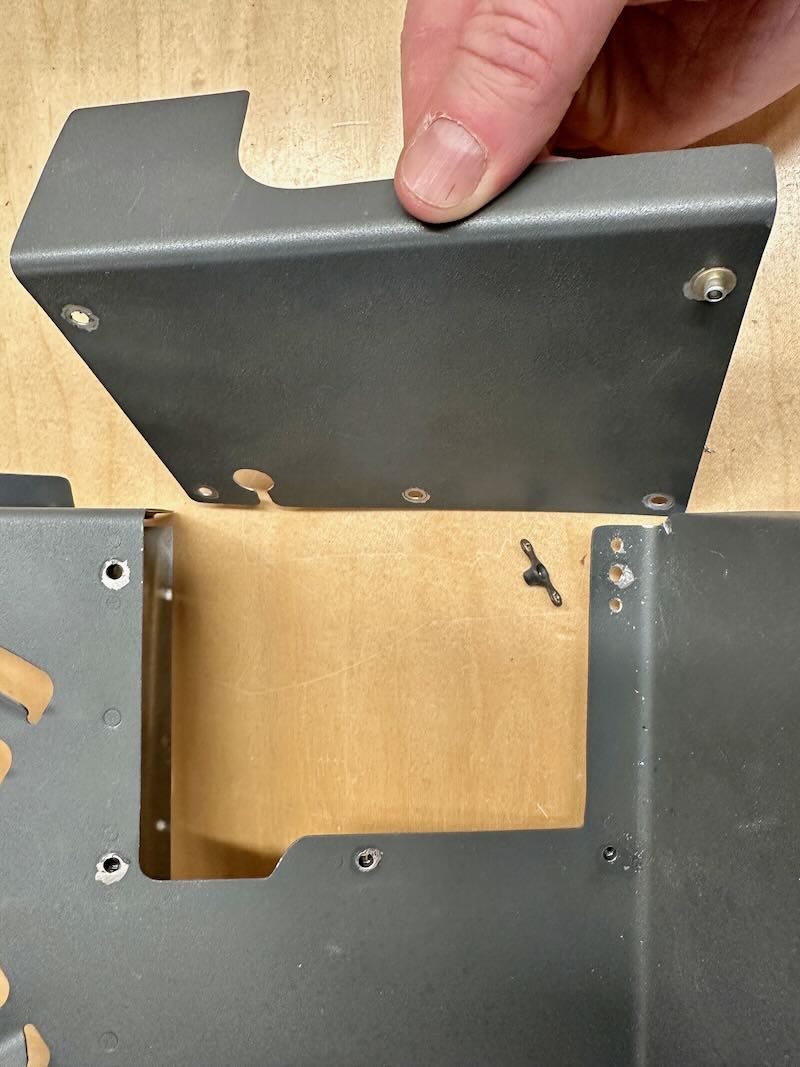
To prevent this from happening again, I simply deleted the nutplate from the offending hole, and filled the hole in the access plate with a rivet to make sure I'm not tempted to stick a screw in there in the future. This purely cosmetic little plate will be more than secure enough with only four out of five screws present:

While I had all the fuel plumbing out of the airplane, I decided to service the fuel filter and see if it had picked up any debris from inside the tanks. There's no good way to do this without spilling a bunch of fuel, but at least on the bench it's easier to clean up. I inspected the filter element – nothing of note so far – and cleaned it with mineral spirits. The o-rings still seem to be holding up, so I just lubricated and reinstalled them:

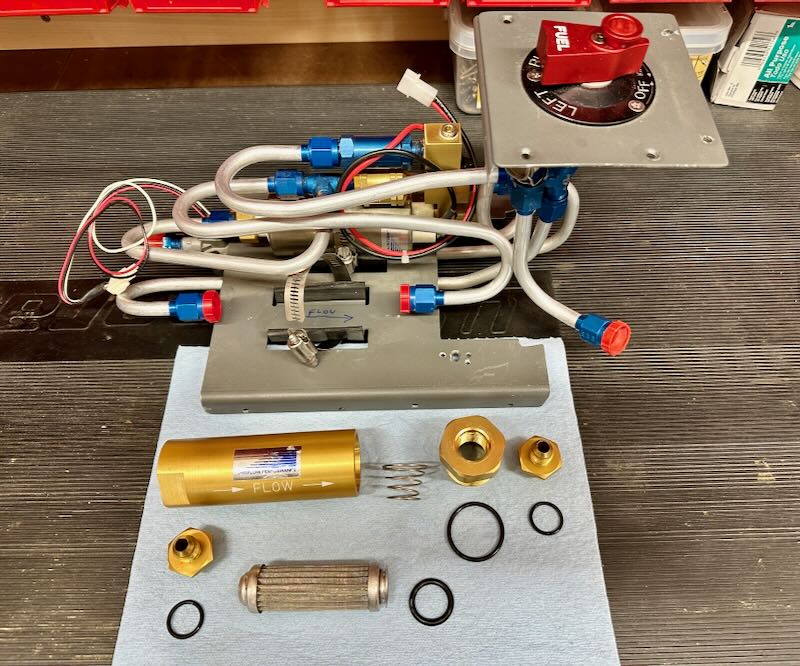
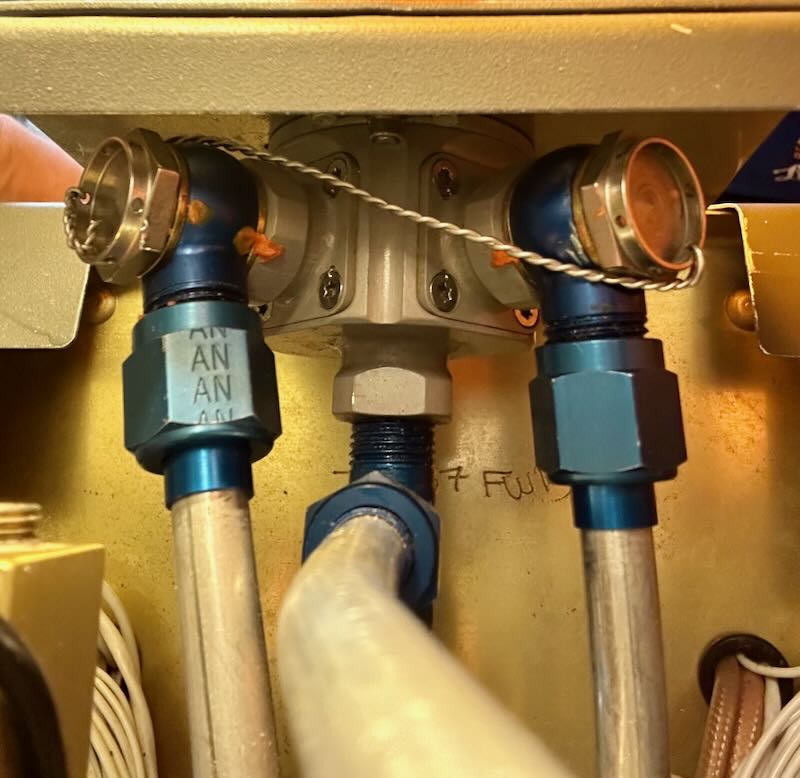
While putting the fuel system back together, I also took the opportunity to retorque the banjo fittings on the fuel selector, and improve the safety wire that secures them. The photo makes it look slack, but in real life it's plenty tight. I don't know why I didn't think of this simpler method before:

Finally, after many days of fighting with it, I got everything put back the way it was a couple weeks ago:

Airworthiness inspection

June 6th, 2024

My friend Paul recently received his DAR designation, and I had the honor of receiving his first unsupervised airworthiness inspection for an amateur-built aircraft.

I had all my paperwork ready, after triple checking it was all in order – even punctuation matters for this part:

I had the airplane all opened up so he could give it a thorough going-over, basically equivalent to an annual inspection minus a compression check:

After all that, nothing was found to be incorrect, missing, or out of place, so the airworthiness certificate was issued and the traditional photo was taken:

So now after all these years, the airplane project has become an airplane, in the eyes of the law anyway. But I still have a few things to take care of before I'll have the opportunity to see if it will really do airplane things.

Weight & balance

March 31st, 2024

I leveled the airplane and used plumb bobs to mark the location of the wing leading edges and the center points of all the three wheels. From these marks I was able to measure the arm figures for each wheel, to be used later when calculating the CG. The measured locations of the main wheels ended up being within 1/10" of each other, so I just split the difference and recorded them both as the same value.

Purpose-designed aircraft scales are super expensive, but these days you can buy pretty accurate digital scales for not much money. I bought three of these 660 lb scales from Amazon and satisfied myself, by standing on each one in turn, that they were probably accurate:

I made some ramps to help me roll the airplane up onto the scales, by gluing together some thin plywood in a stair-step manner:

I cut these to size and rounded the corners of each step – they actually work pretty well, and were cheap to make:

I installed all the removable pieces of the airplane – cowl, covers, panels, interior, and seats – and rolled the plane onto the scales for an initial weight check. This didn't give me accurate weights for each wheel, but I wanted to double-check the total weight before getting too far along:

Then I leveled the airplane and weighed it again, which gave me a proper weight figure from each wheel. Using the measured positions of each wheel, I made a little spreadsheet to calculate the empty weight and CG position.

The airplane is heavier than I'd hoped, which is not a surprise, but it didn't turn out as heavy as it could have been. In the future I might look at a lightweight lithium battery as an easy way to save ten pounds, and perhaps a future panel makeover – or even a composite propeller – will make it lighter as well. Still, for now I have enough useful load to carry myself, my wife, full fuel, and some luggage, which is really the main goal.

As for the CG position, it ended up pretty far forward, which is a good thing for the RV-7. I calculated various loading scenarios, and the only time the aft CG limit is a concern is if I have two big guys, empty tanks, and a whole lot of baggage – not a common scenario, thankfully.

I have to pull everything apart again for the final inspection, but first I had to take a picture of the airplane in the highest state of put-togetherness that it's ever been so far:

External markings

March 17th, 2024

I obtained a pair of vinyl N-number decals from Aerographics, and a properly-marked data plate from Aircraft Engravers. I riveted the data plate under the horizontal stabilizer, and stuck the decals on the aft fuselage. For the N-number I used my (and Mary's) initials instead of the traditional "RV" suffix, since it seems like half the CTAF traffic around here is "something something Romeo Victor".

Also from Aerographics, I picked up a set of warning labels to hopefully help people remember not to stand on the flaps:

I still have a few things left to take care of, but for the most part the only things preventing a first flight are paperwork-related: